CAMIS 2.0 User Guide: A Step-by-Step Guide to Creating Your Account
Introduction
Welcome to the CAMIS 2.0 User Guide! This comprehensive guide is designed for Teachers, Directors of Study, and Headteachers to walk you through the simple process of creating your new CAMIS 2.0 user account. By following these steps, you will gain secure access to all the features CAMIS has to offer.
The Account Creation Process
The entire process is straightforward and involves a few key stages, from initial navigation to setting up your security questions.
Step 0: The Guide Overview
This guide provides a step-by-step walkthrough of the account creation process.
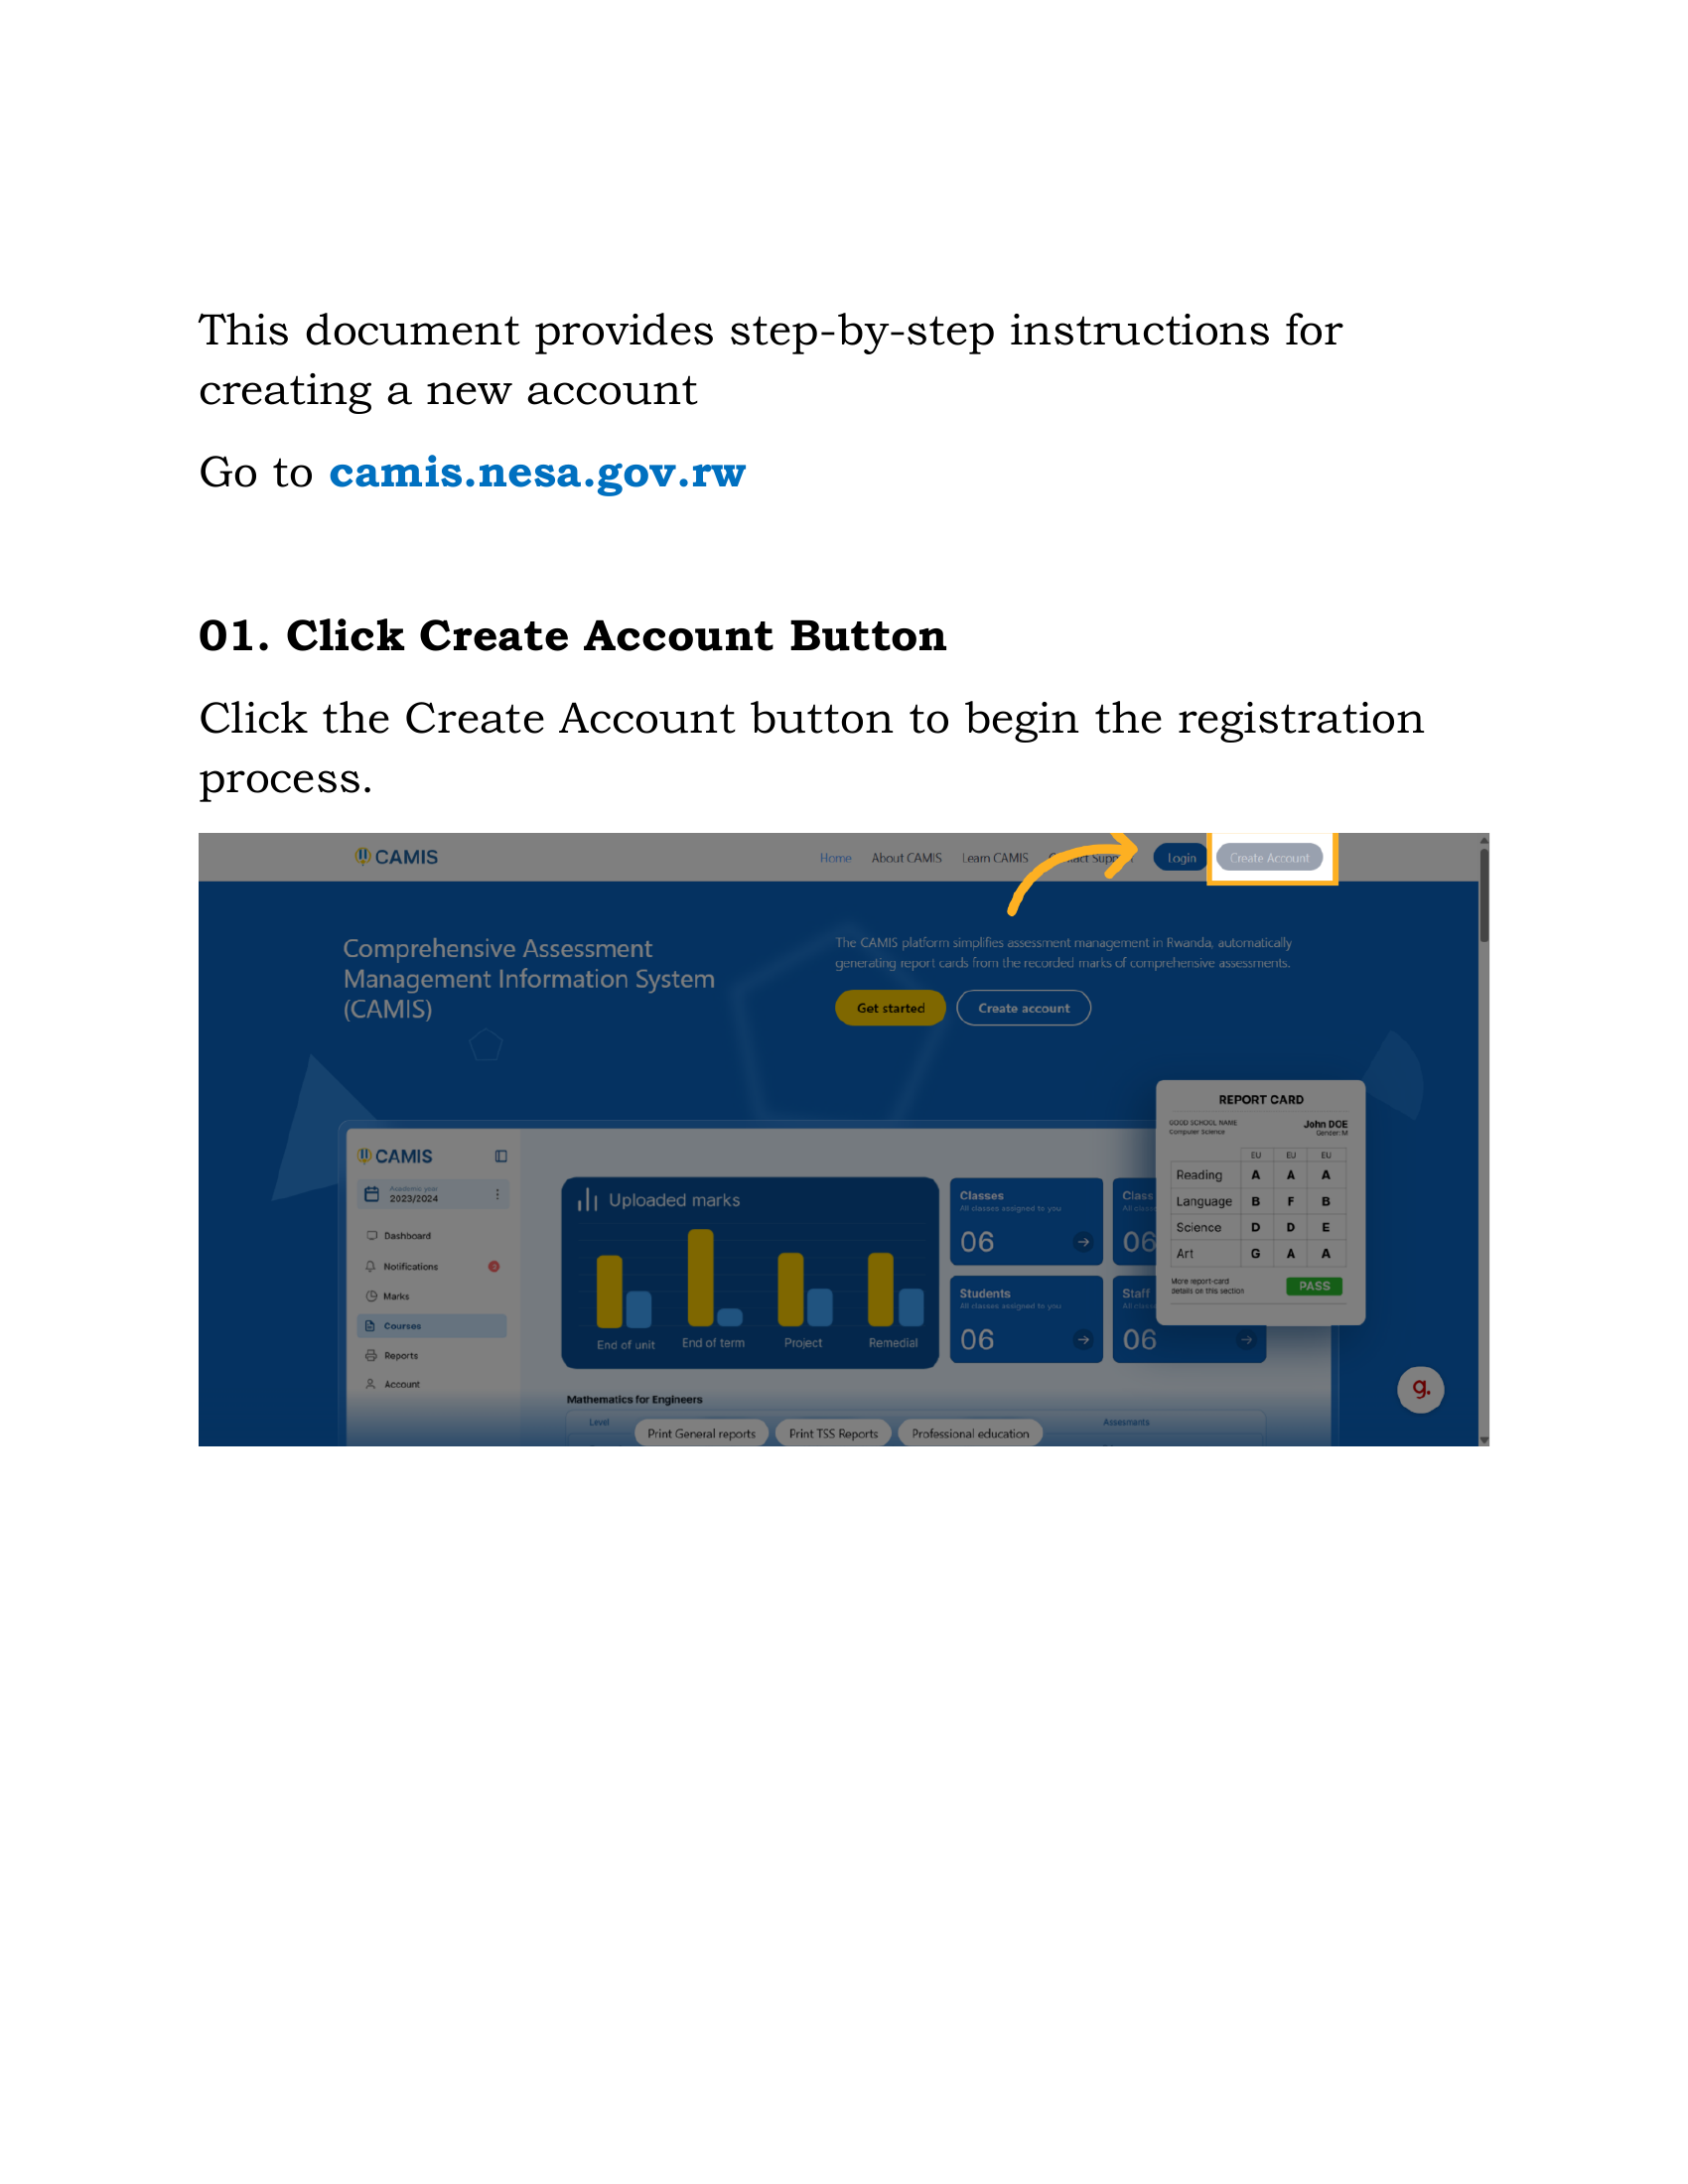
Step 1: Navigate and Initiate Registration
To begin, you must first navigate to the official CAMIS 2.0 website: camis.nesa.gov.rw.
Action: Click the "Create Account" button to start the registration process.
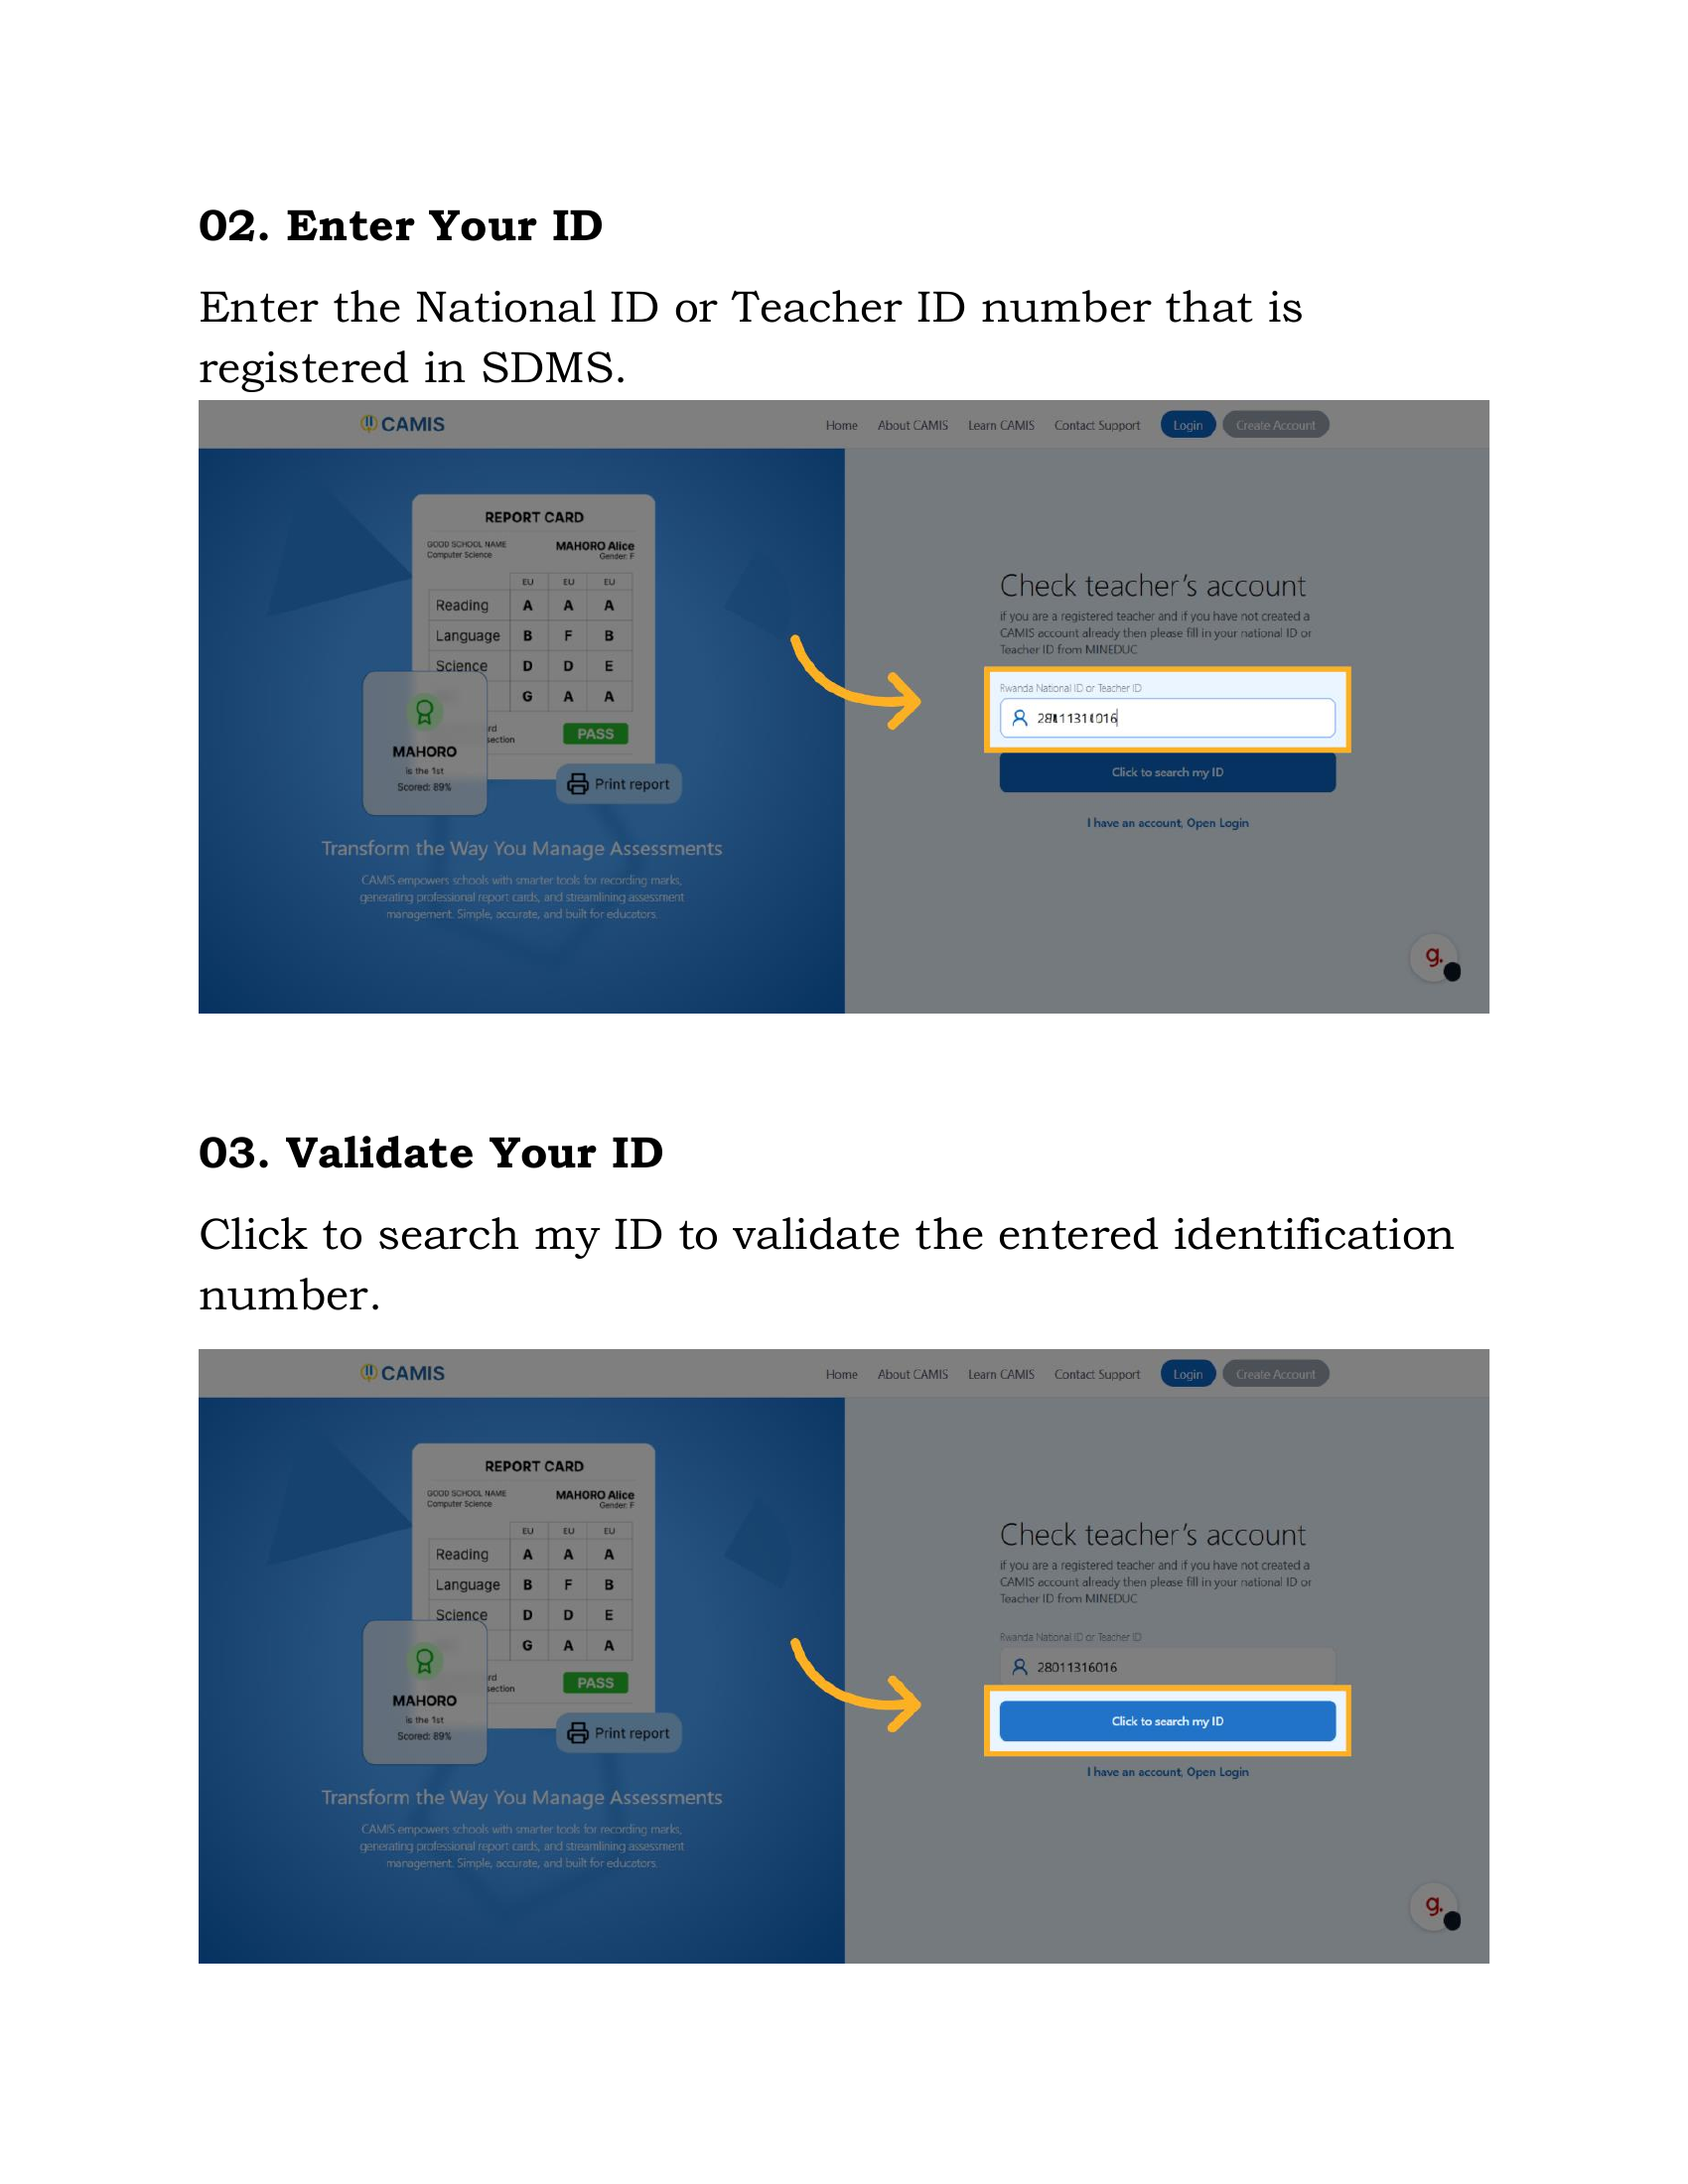
Step 2: Identity Verification
The system requires you to verify your identity using your official credentials.
Action: Enter your National ID or Teacher ID number. Crucially, this ID must be the one registered in the SDMS (School Data Management System).
Action: Click "Click to search my ID" to validate the entered identification number against the system records.
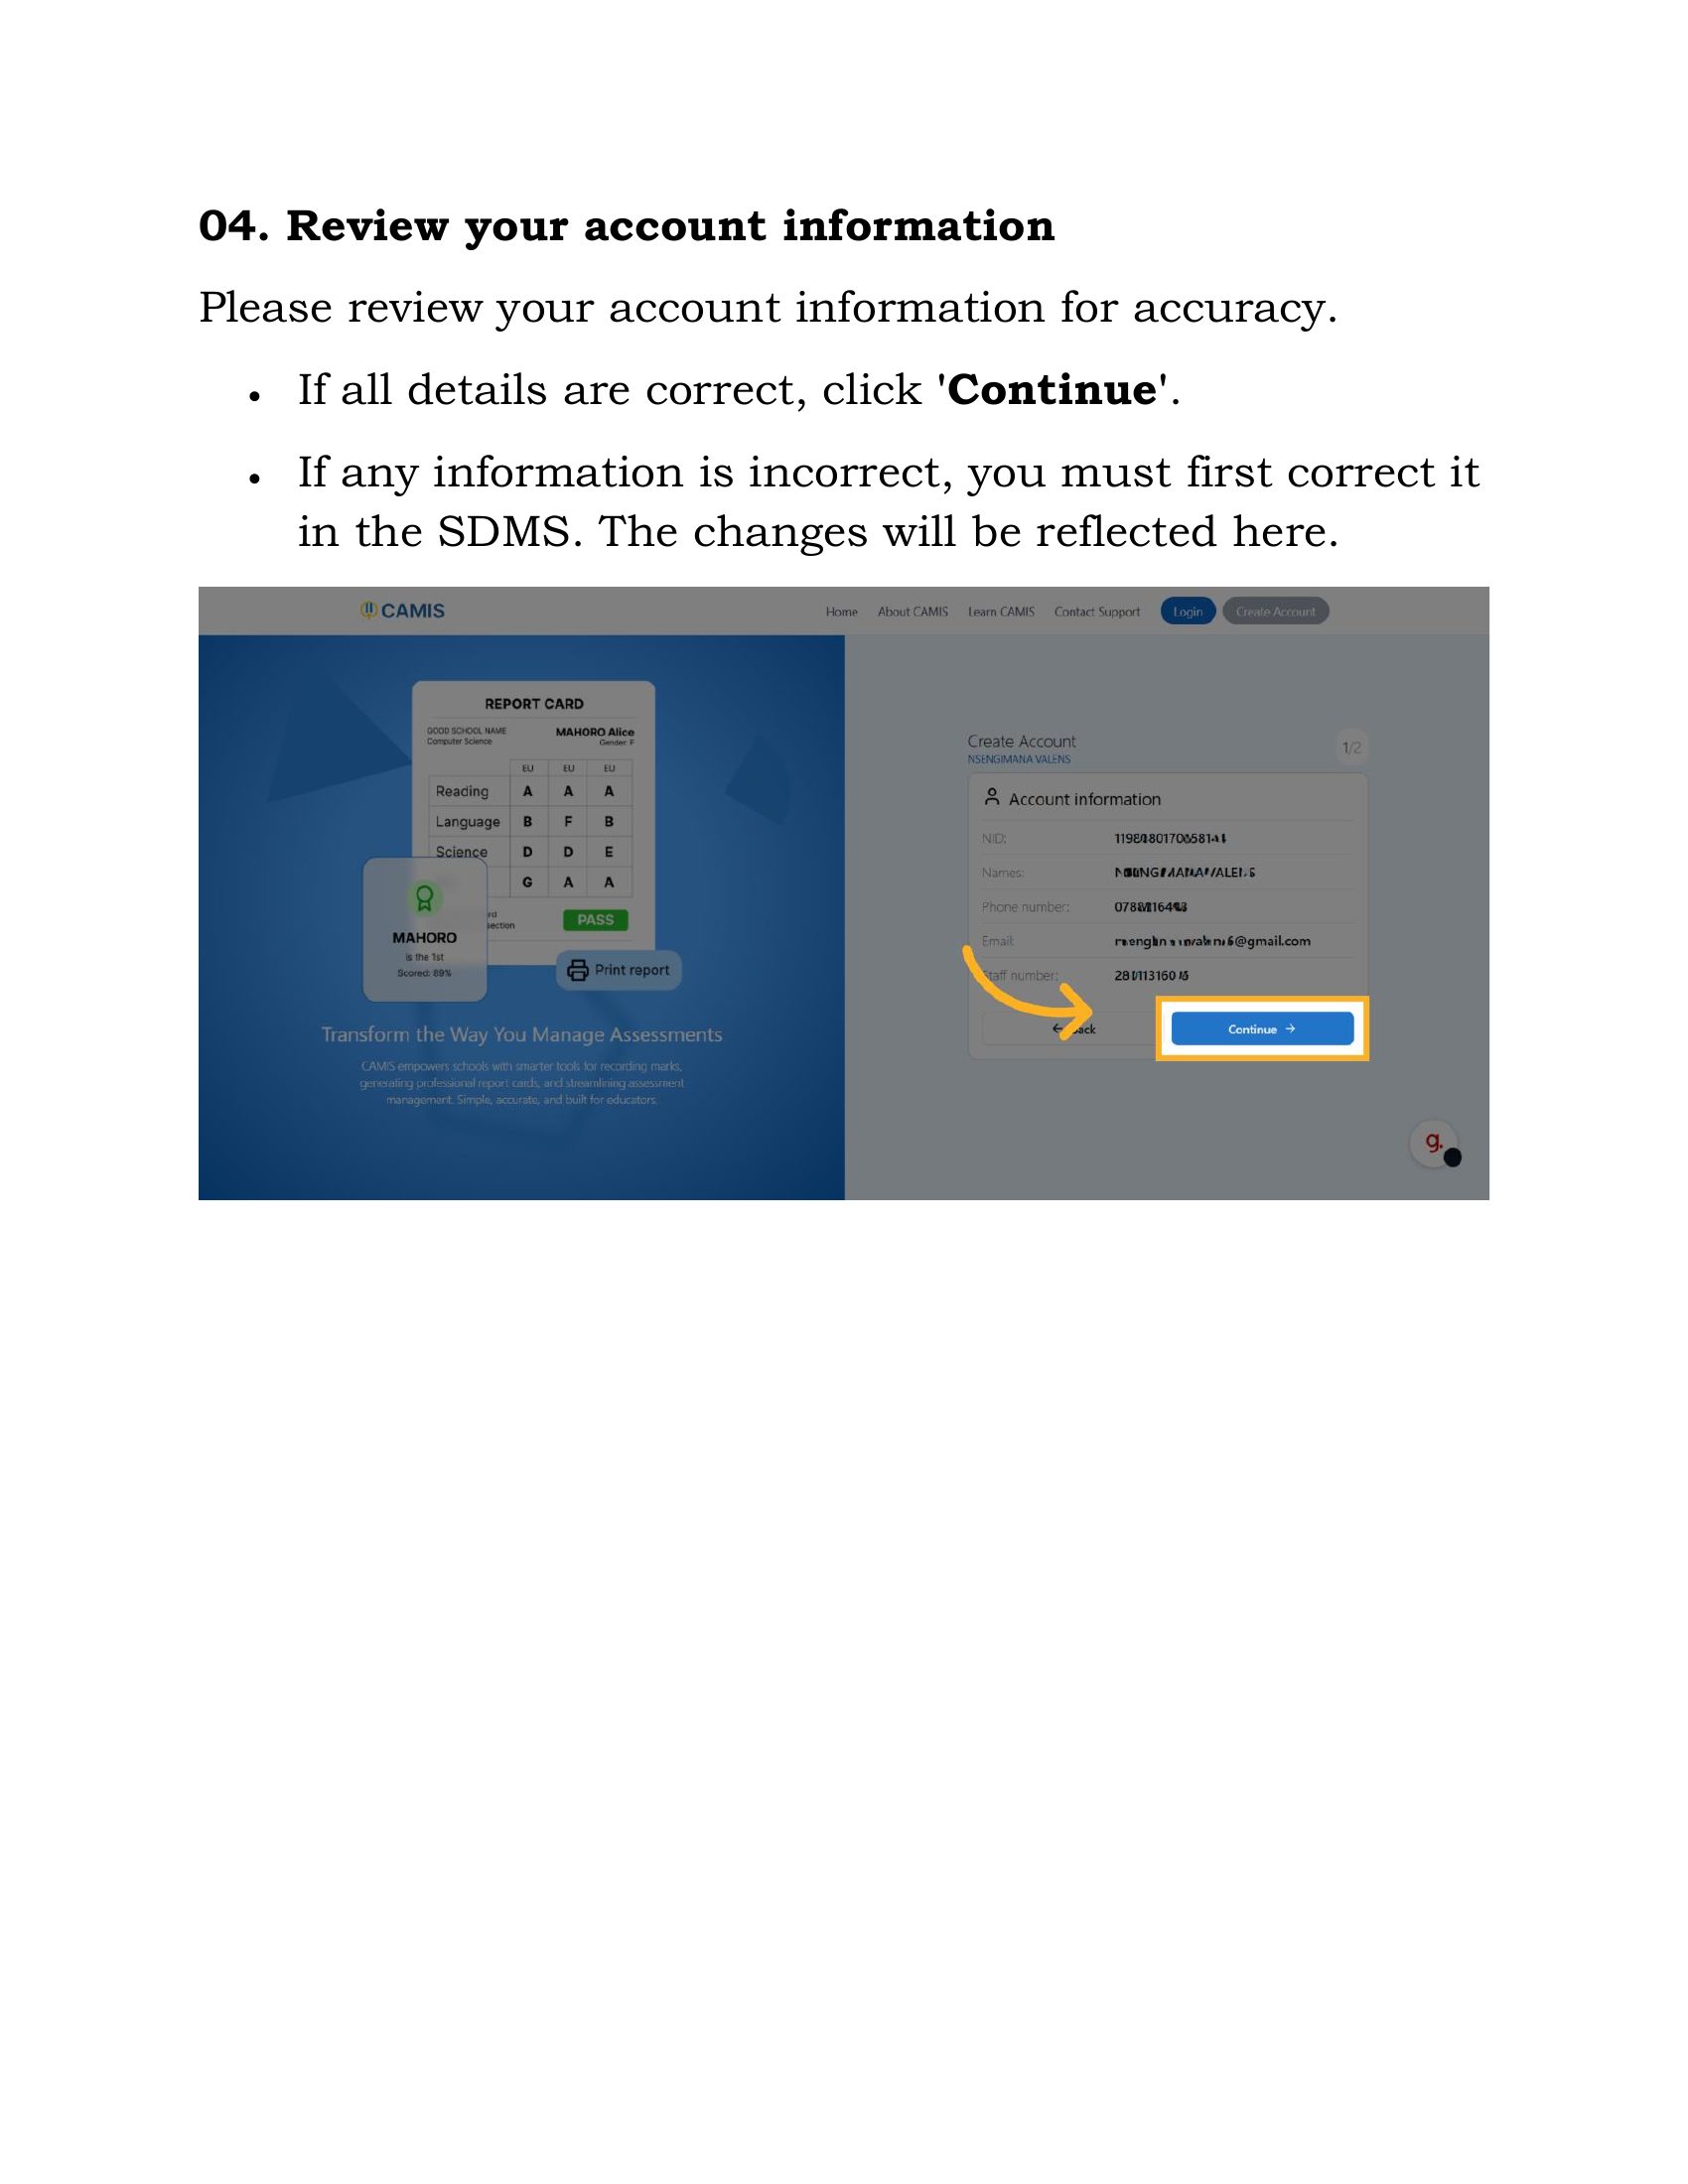
Step 3: Review and Confirm Account Information
After successful validation, your account information will be retrieved from the SDMS.
Action: Carefully review your account information for accuracy.
Important Note: If all details are correct, click "Continue". If you notice any incorrect information, you must first correct it within the SDMS. The changes will then be reflected here.
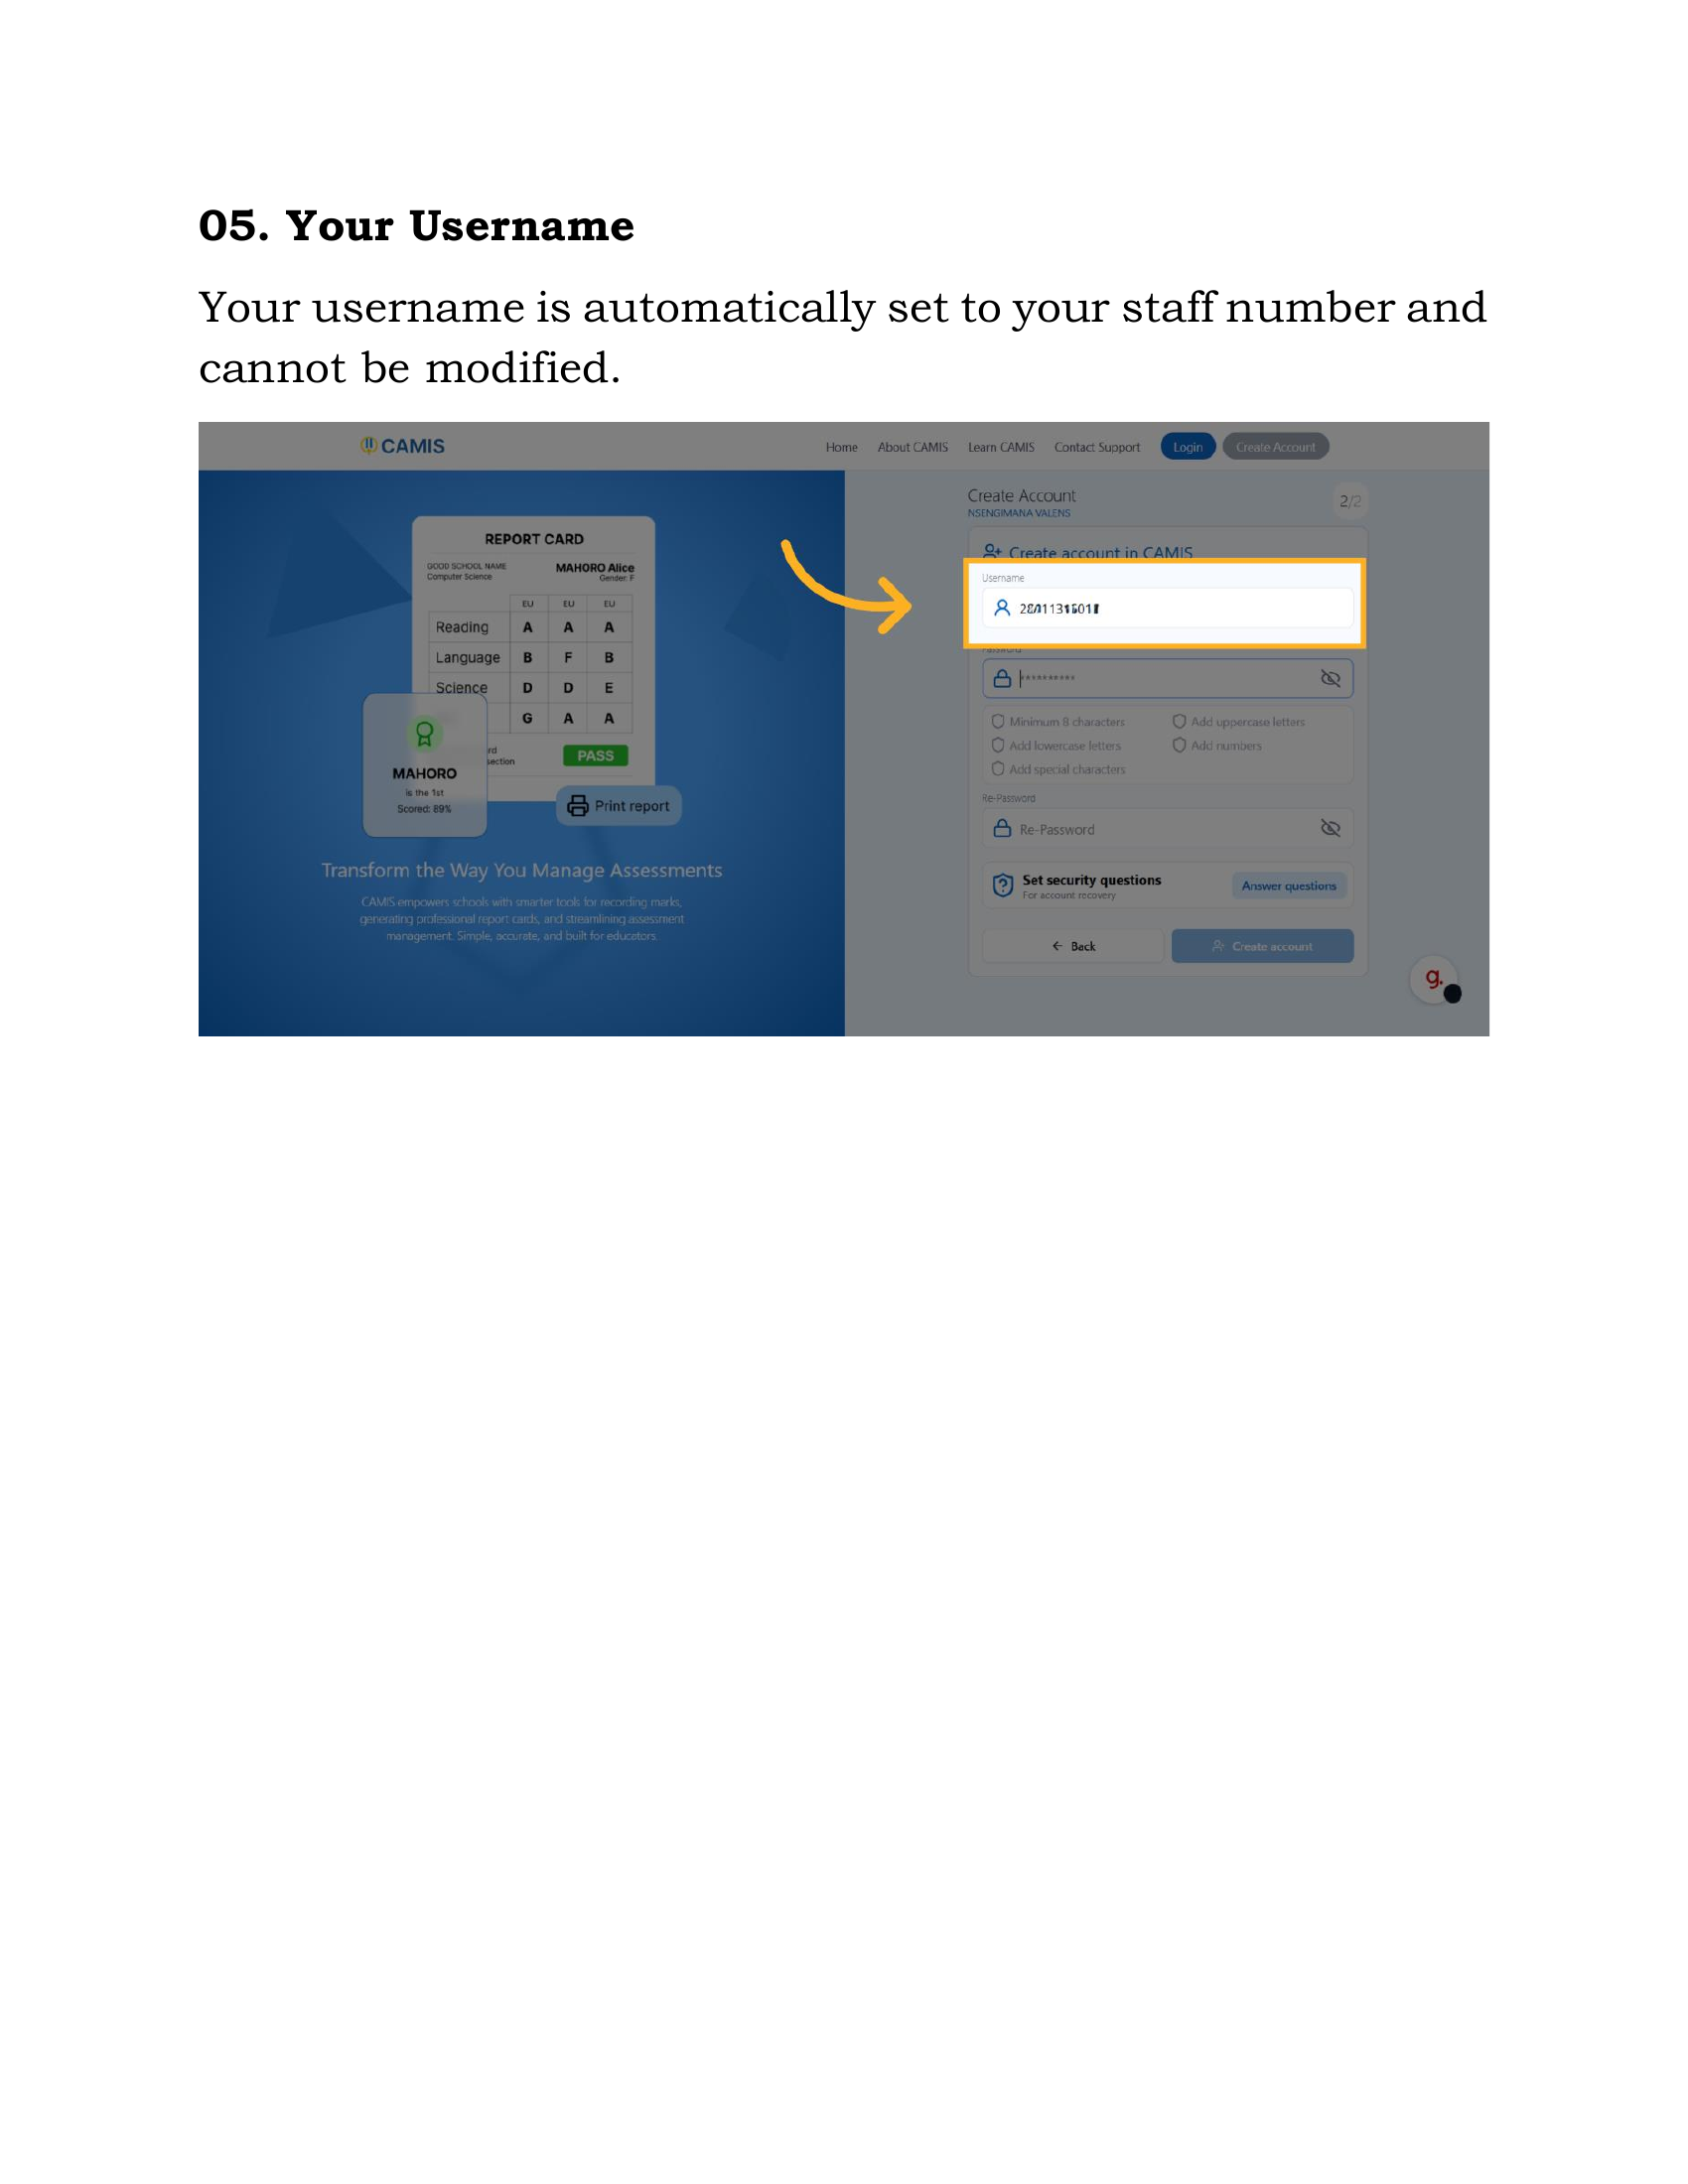
Step 4: Username Assignment
Your username is automatically generated by the system.
Information: Your username is automatically set to your staff number and cannot be modified during this process.
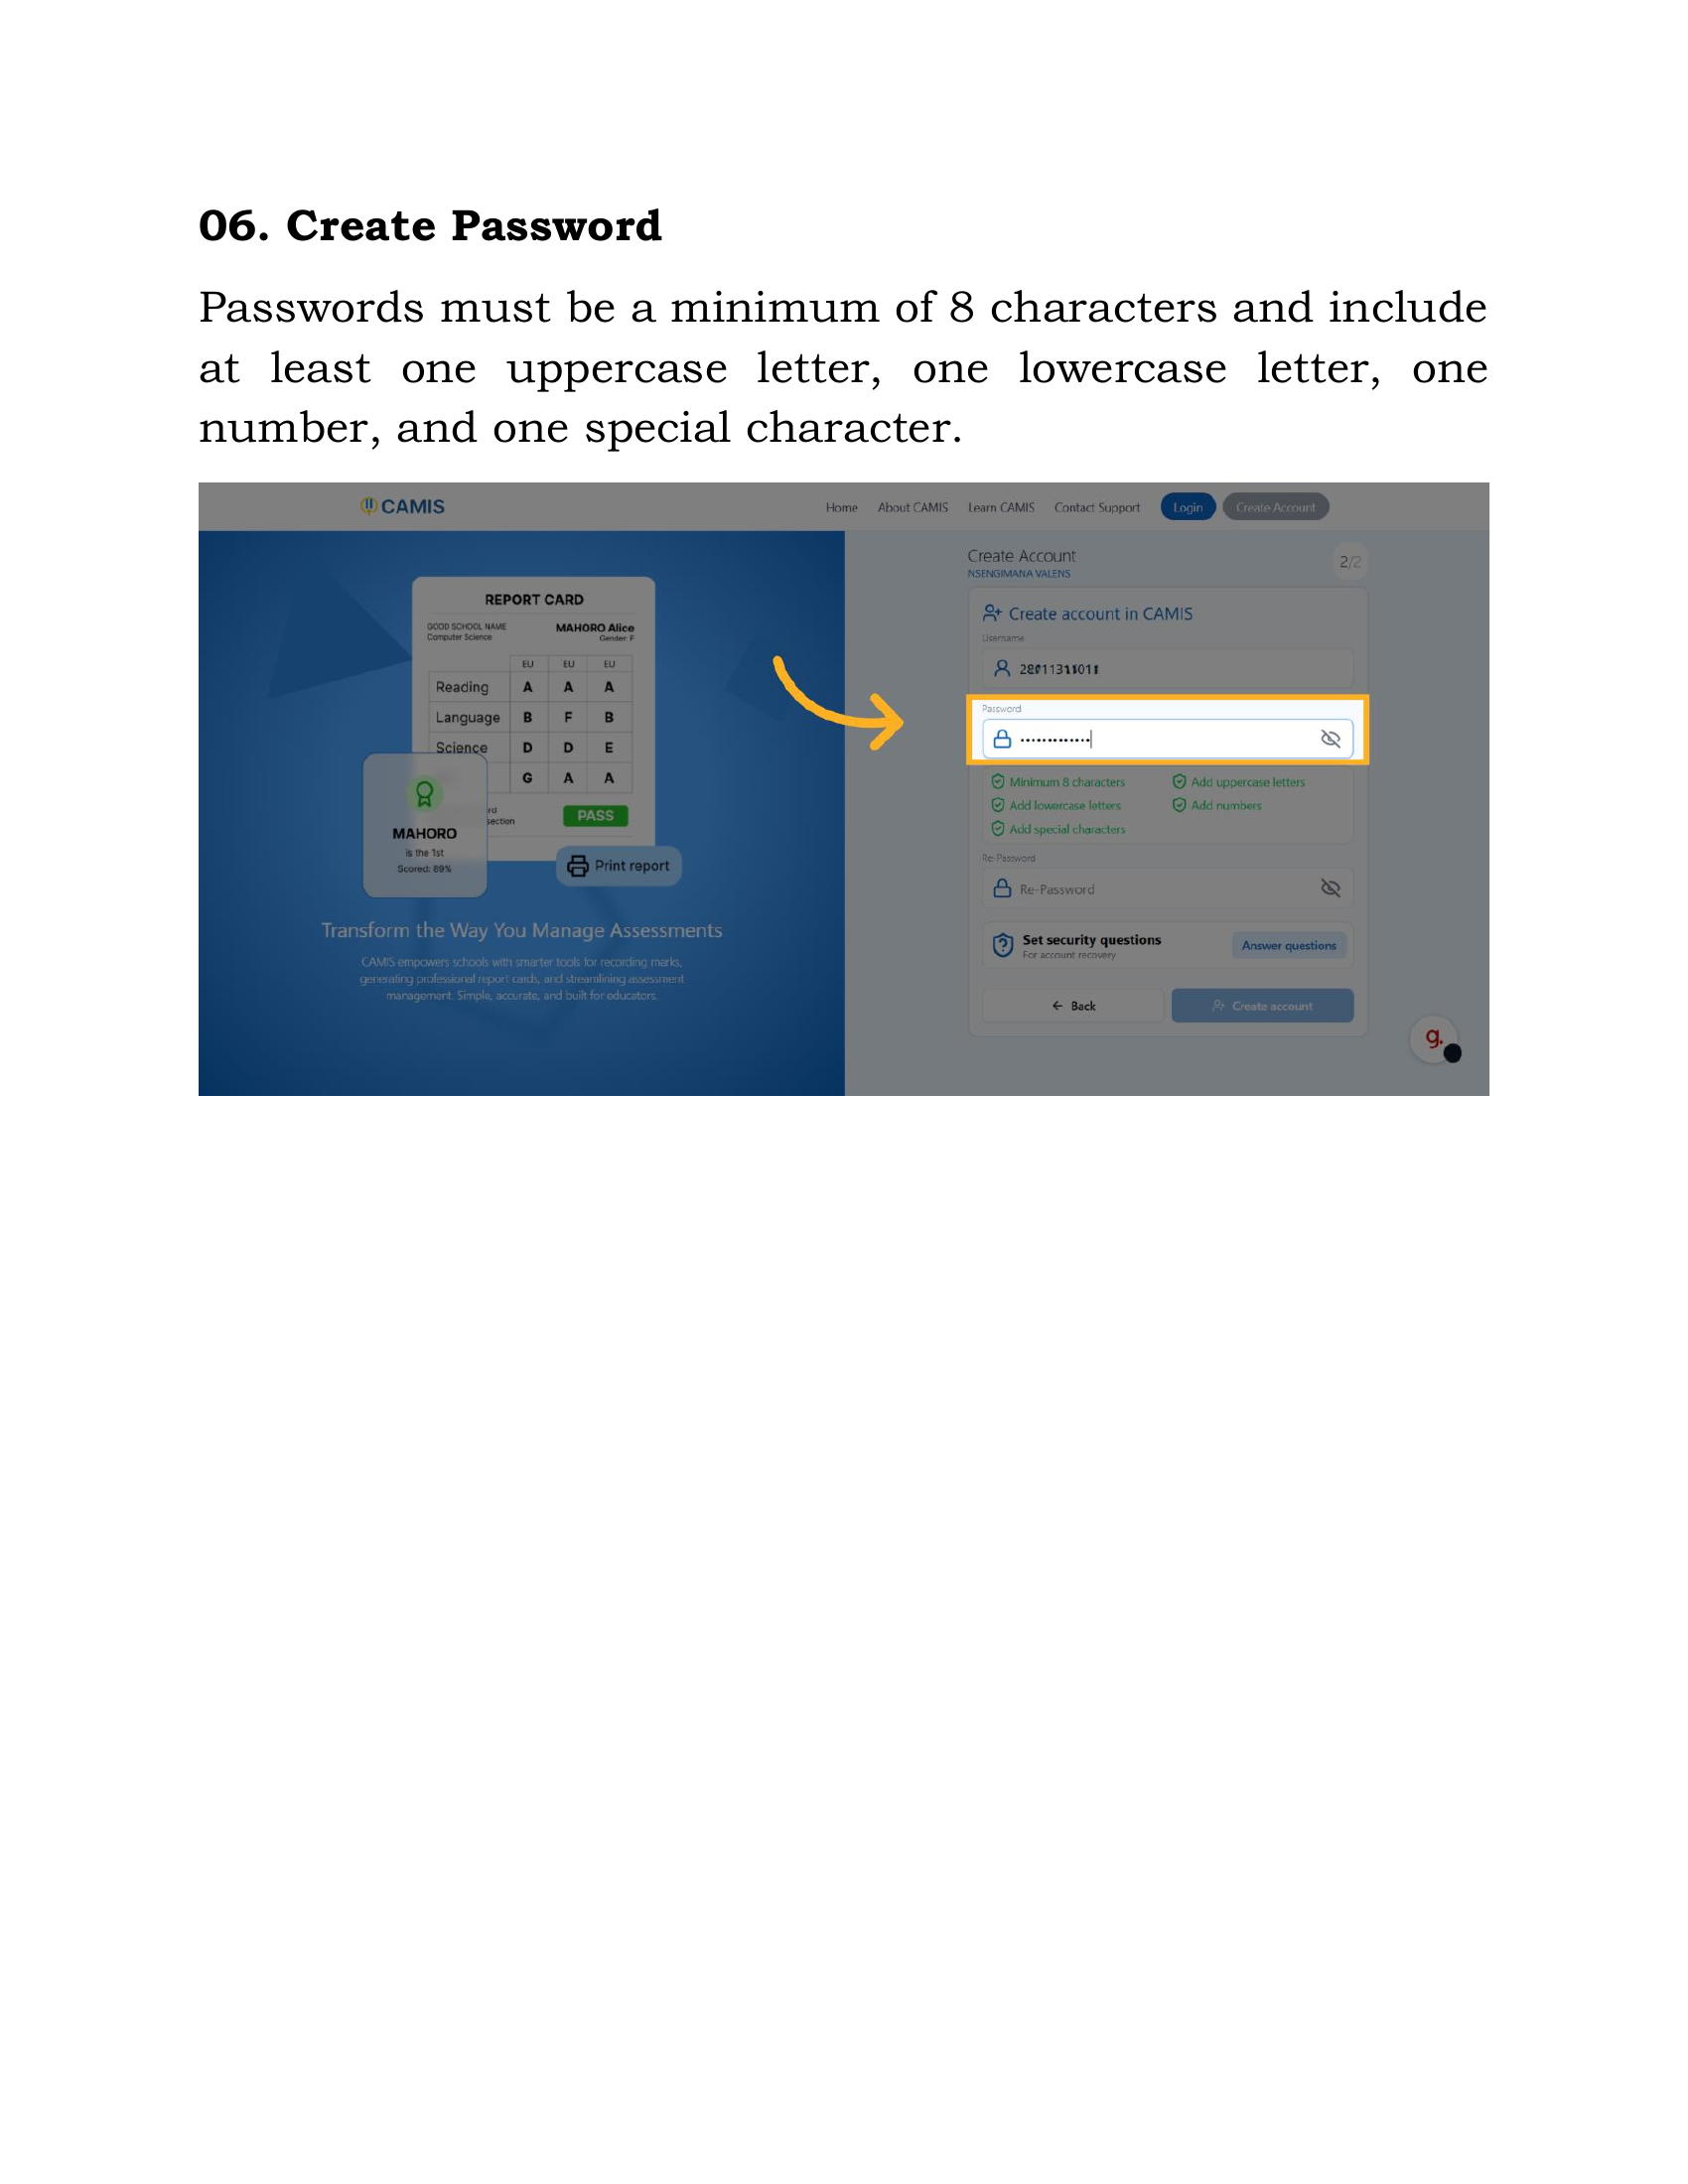
Step 5: Create a Strong Password
Security is paramount. You must create a strong, secure password for your account.
Requirement: Your password must meet the following criteria:
•A minimum of 8 characters in length.
•Include at least one uppercase letter.
•Include at least one lowercase letter.
•Include at least one number.
•Include at least one special character (e.g., !, @, #, $).
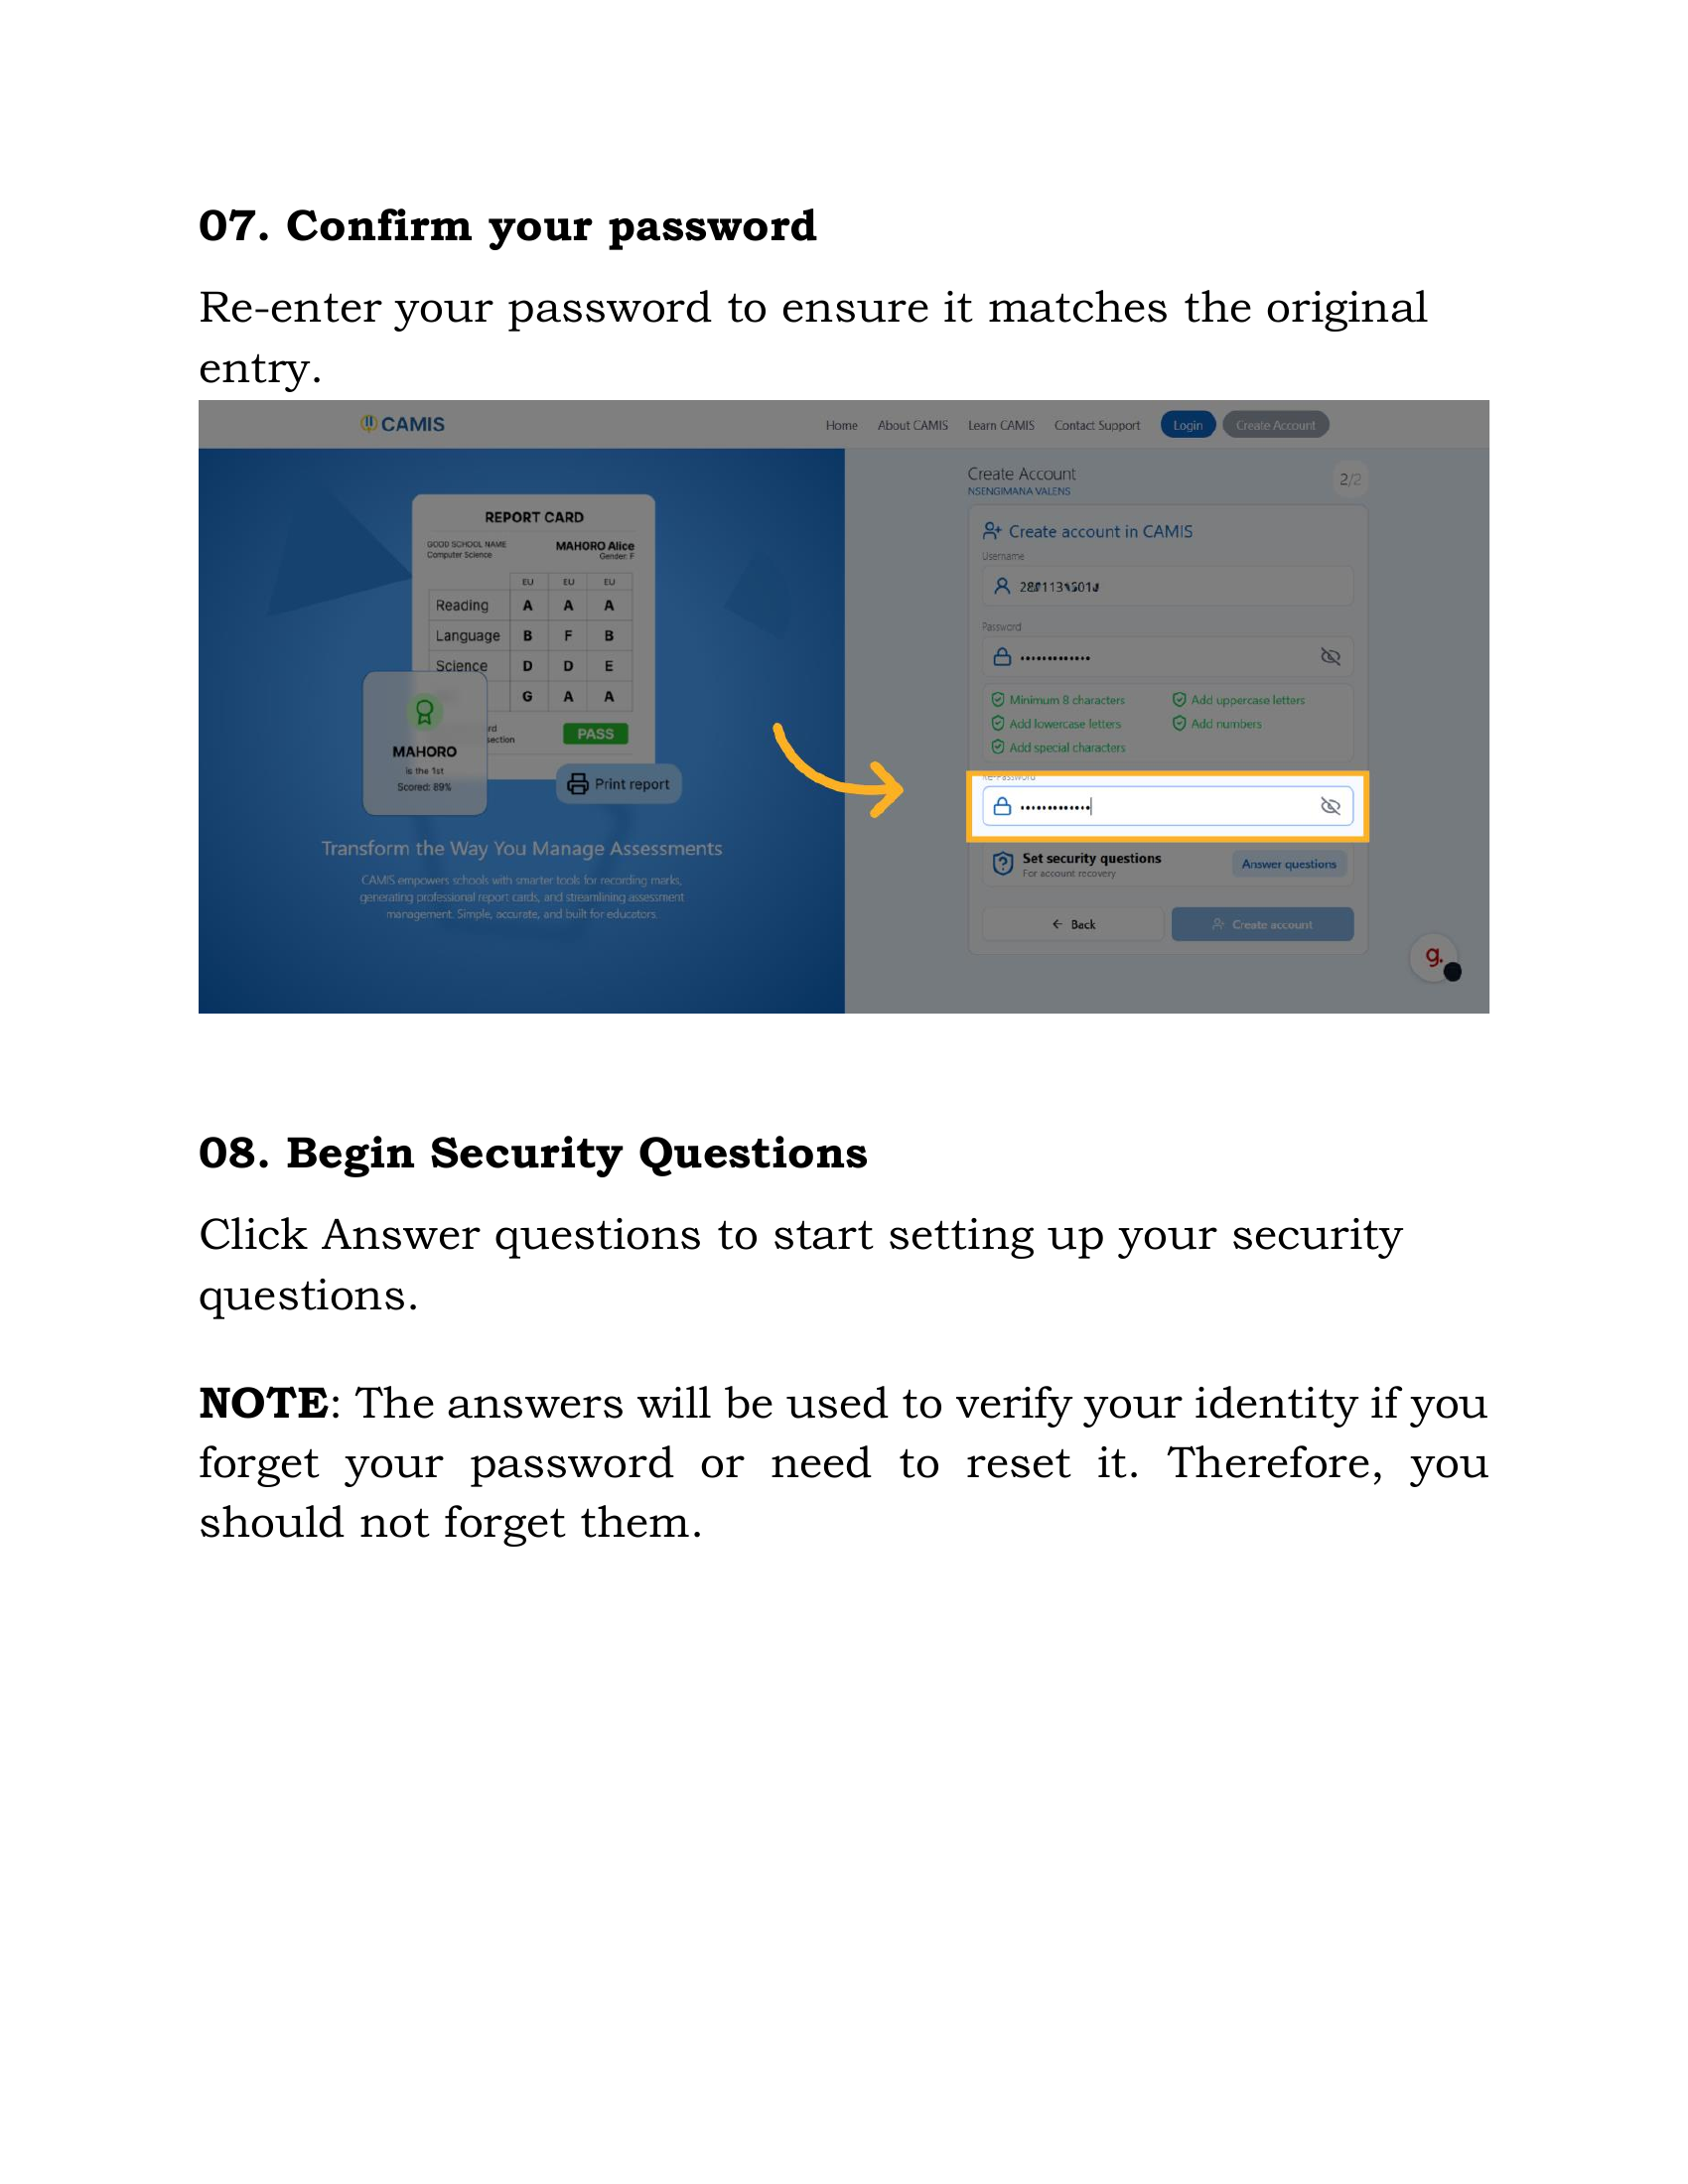
Step 6: Confirm Password and Start Security Setup
You will need to confirm your new password and then proceed to set up your security questions.
Action: Re-enter your password to ensure it matches the original entry.
Action: Click "Answer questions" to begin setting up your security questions.
Security Note: The answers to these questions are vital for verifying your identity if you ever need to reset or recover your password. Choose answers you will not forget.
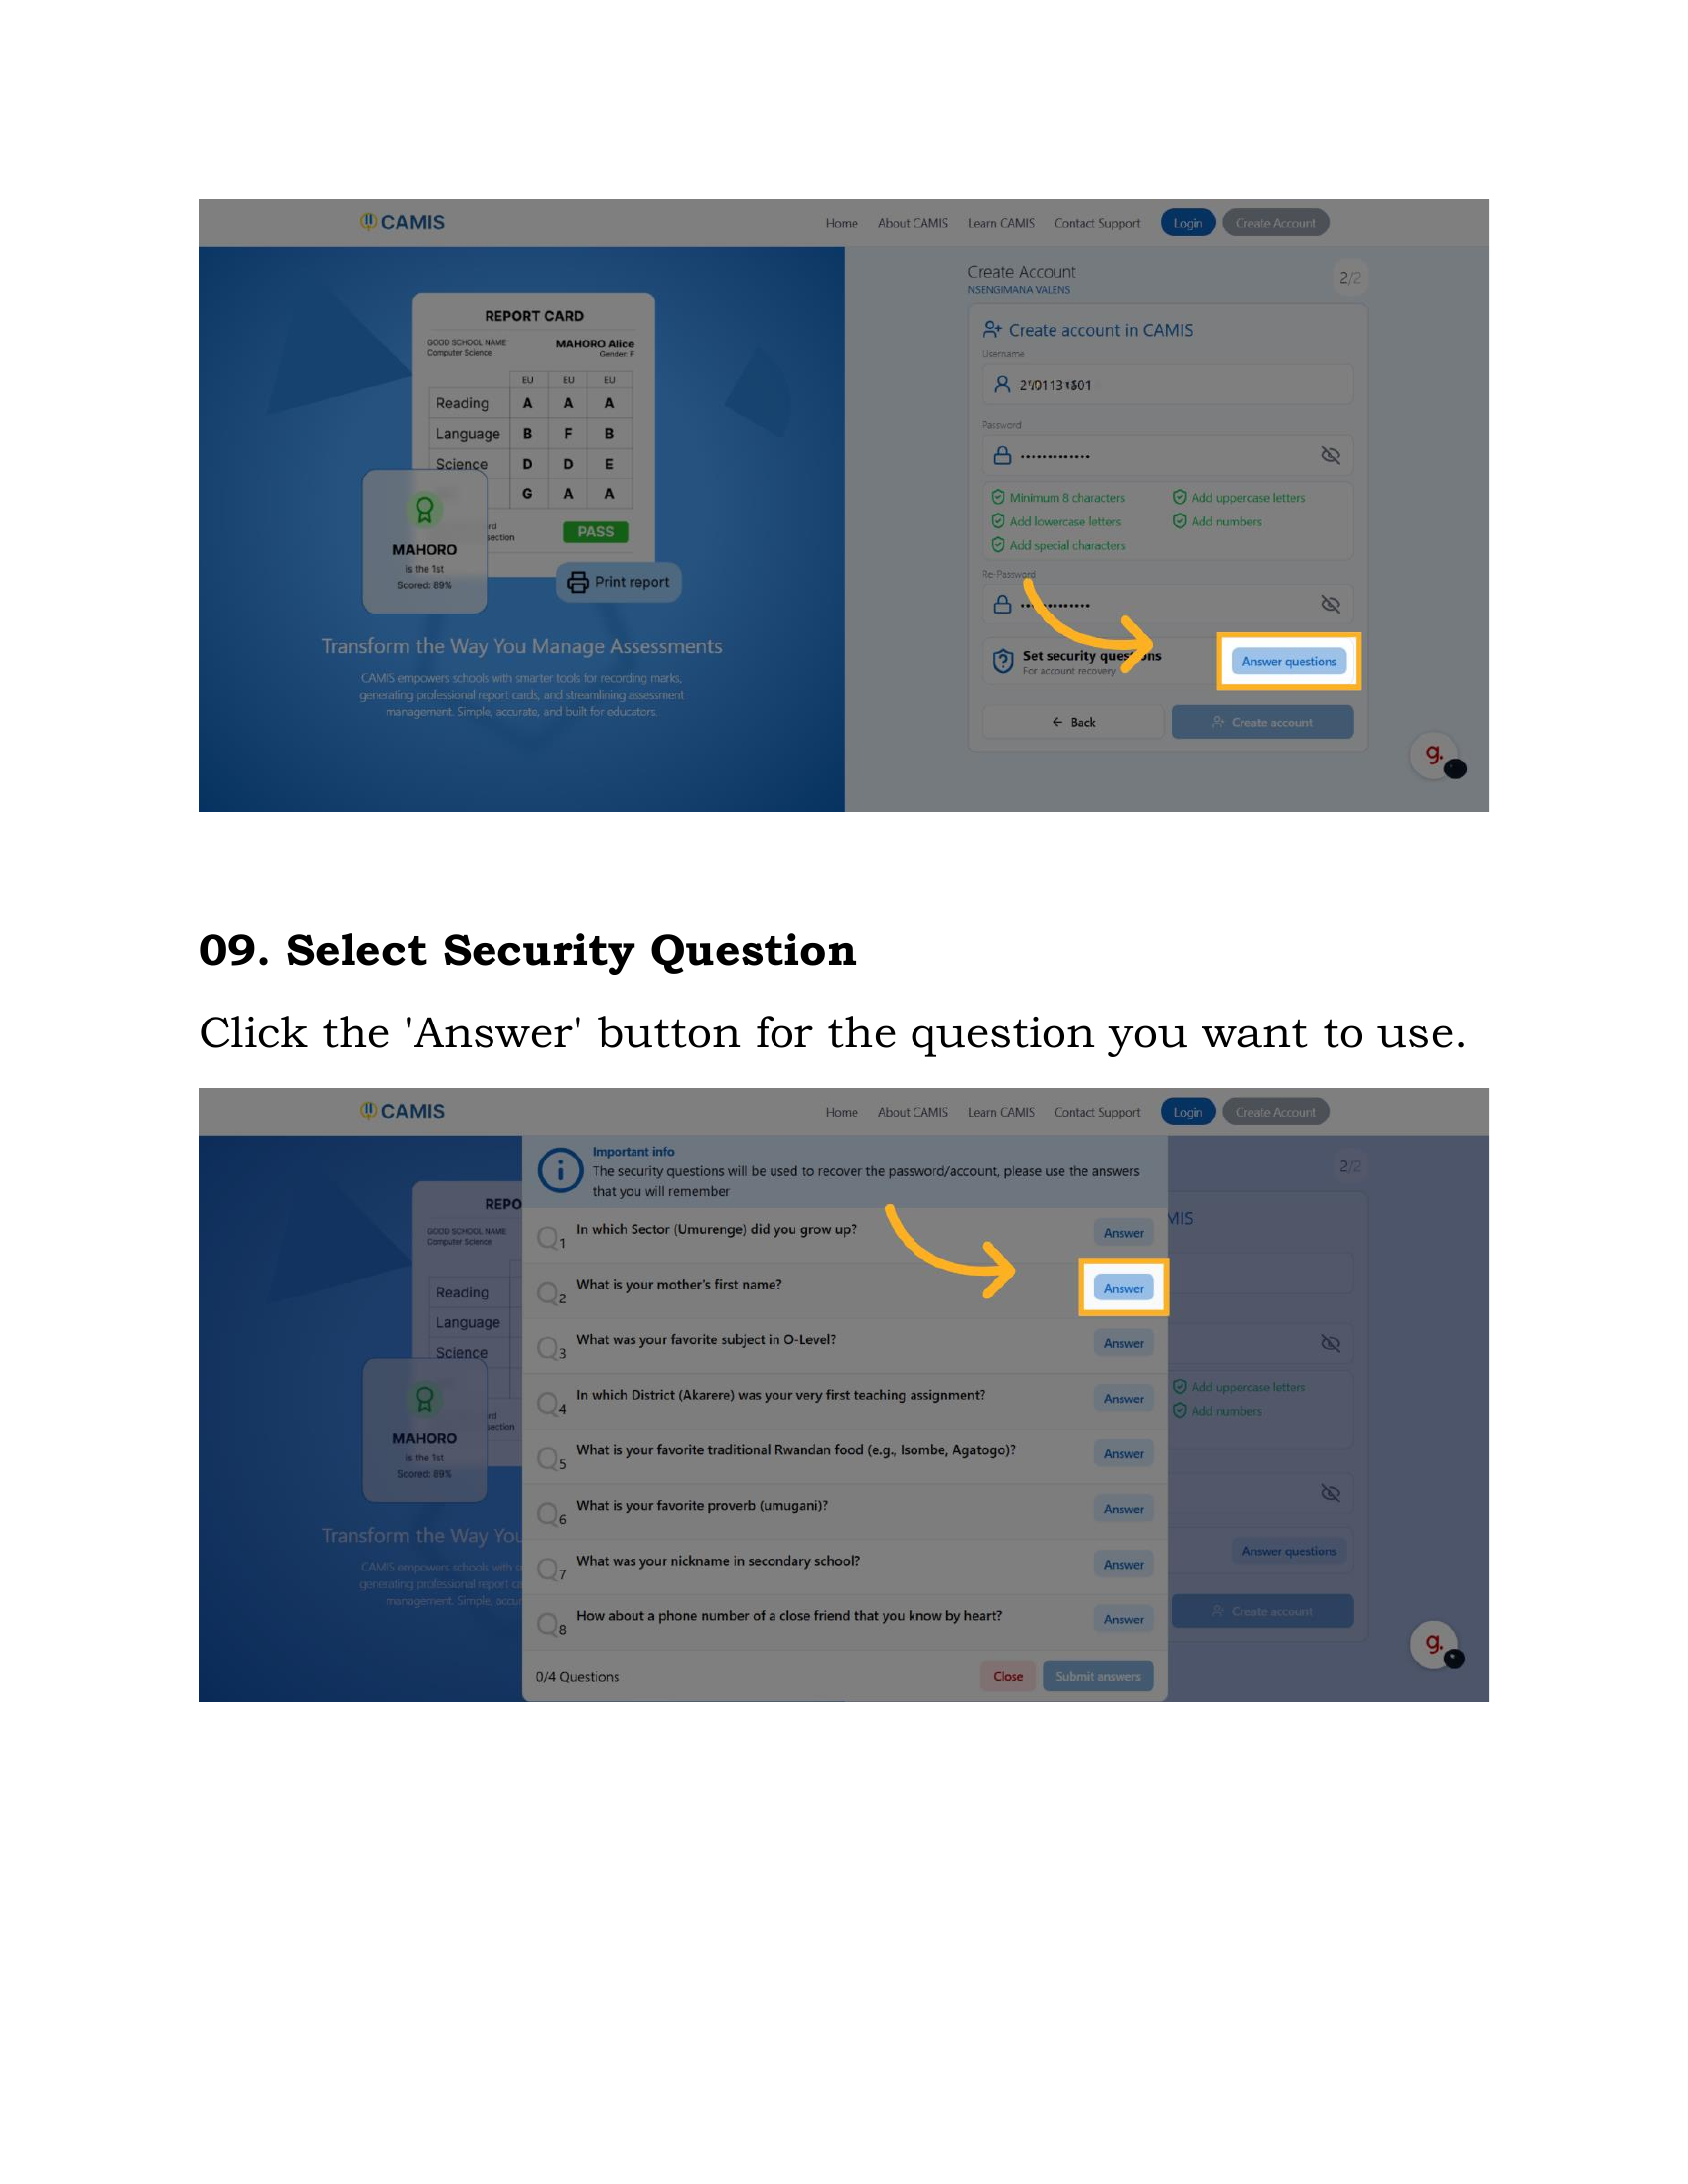
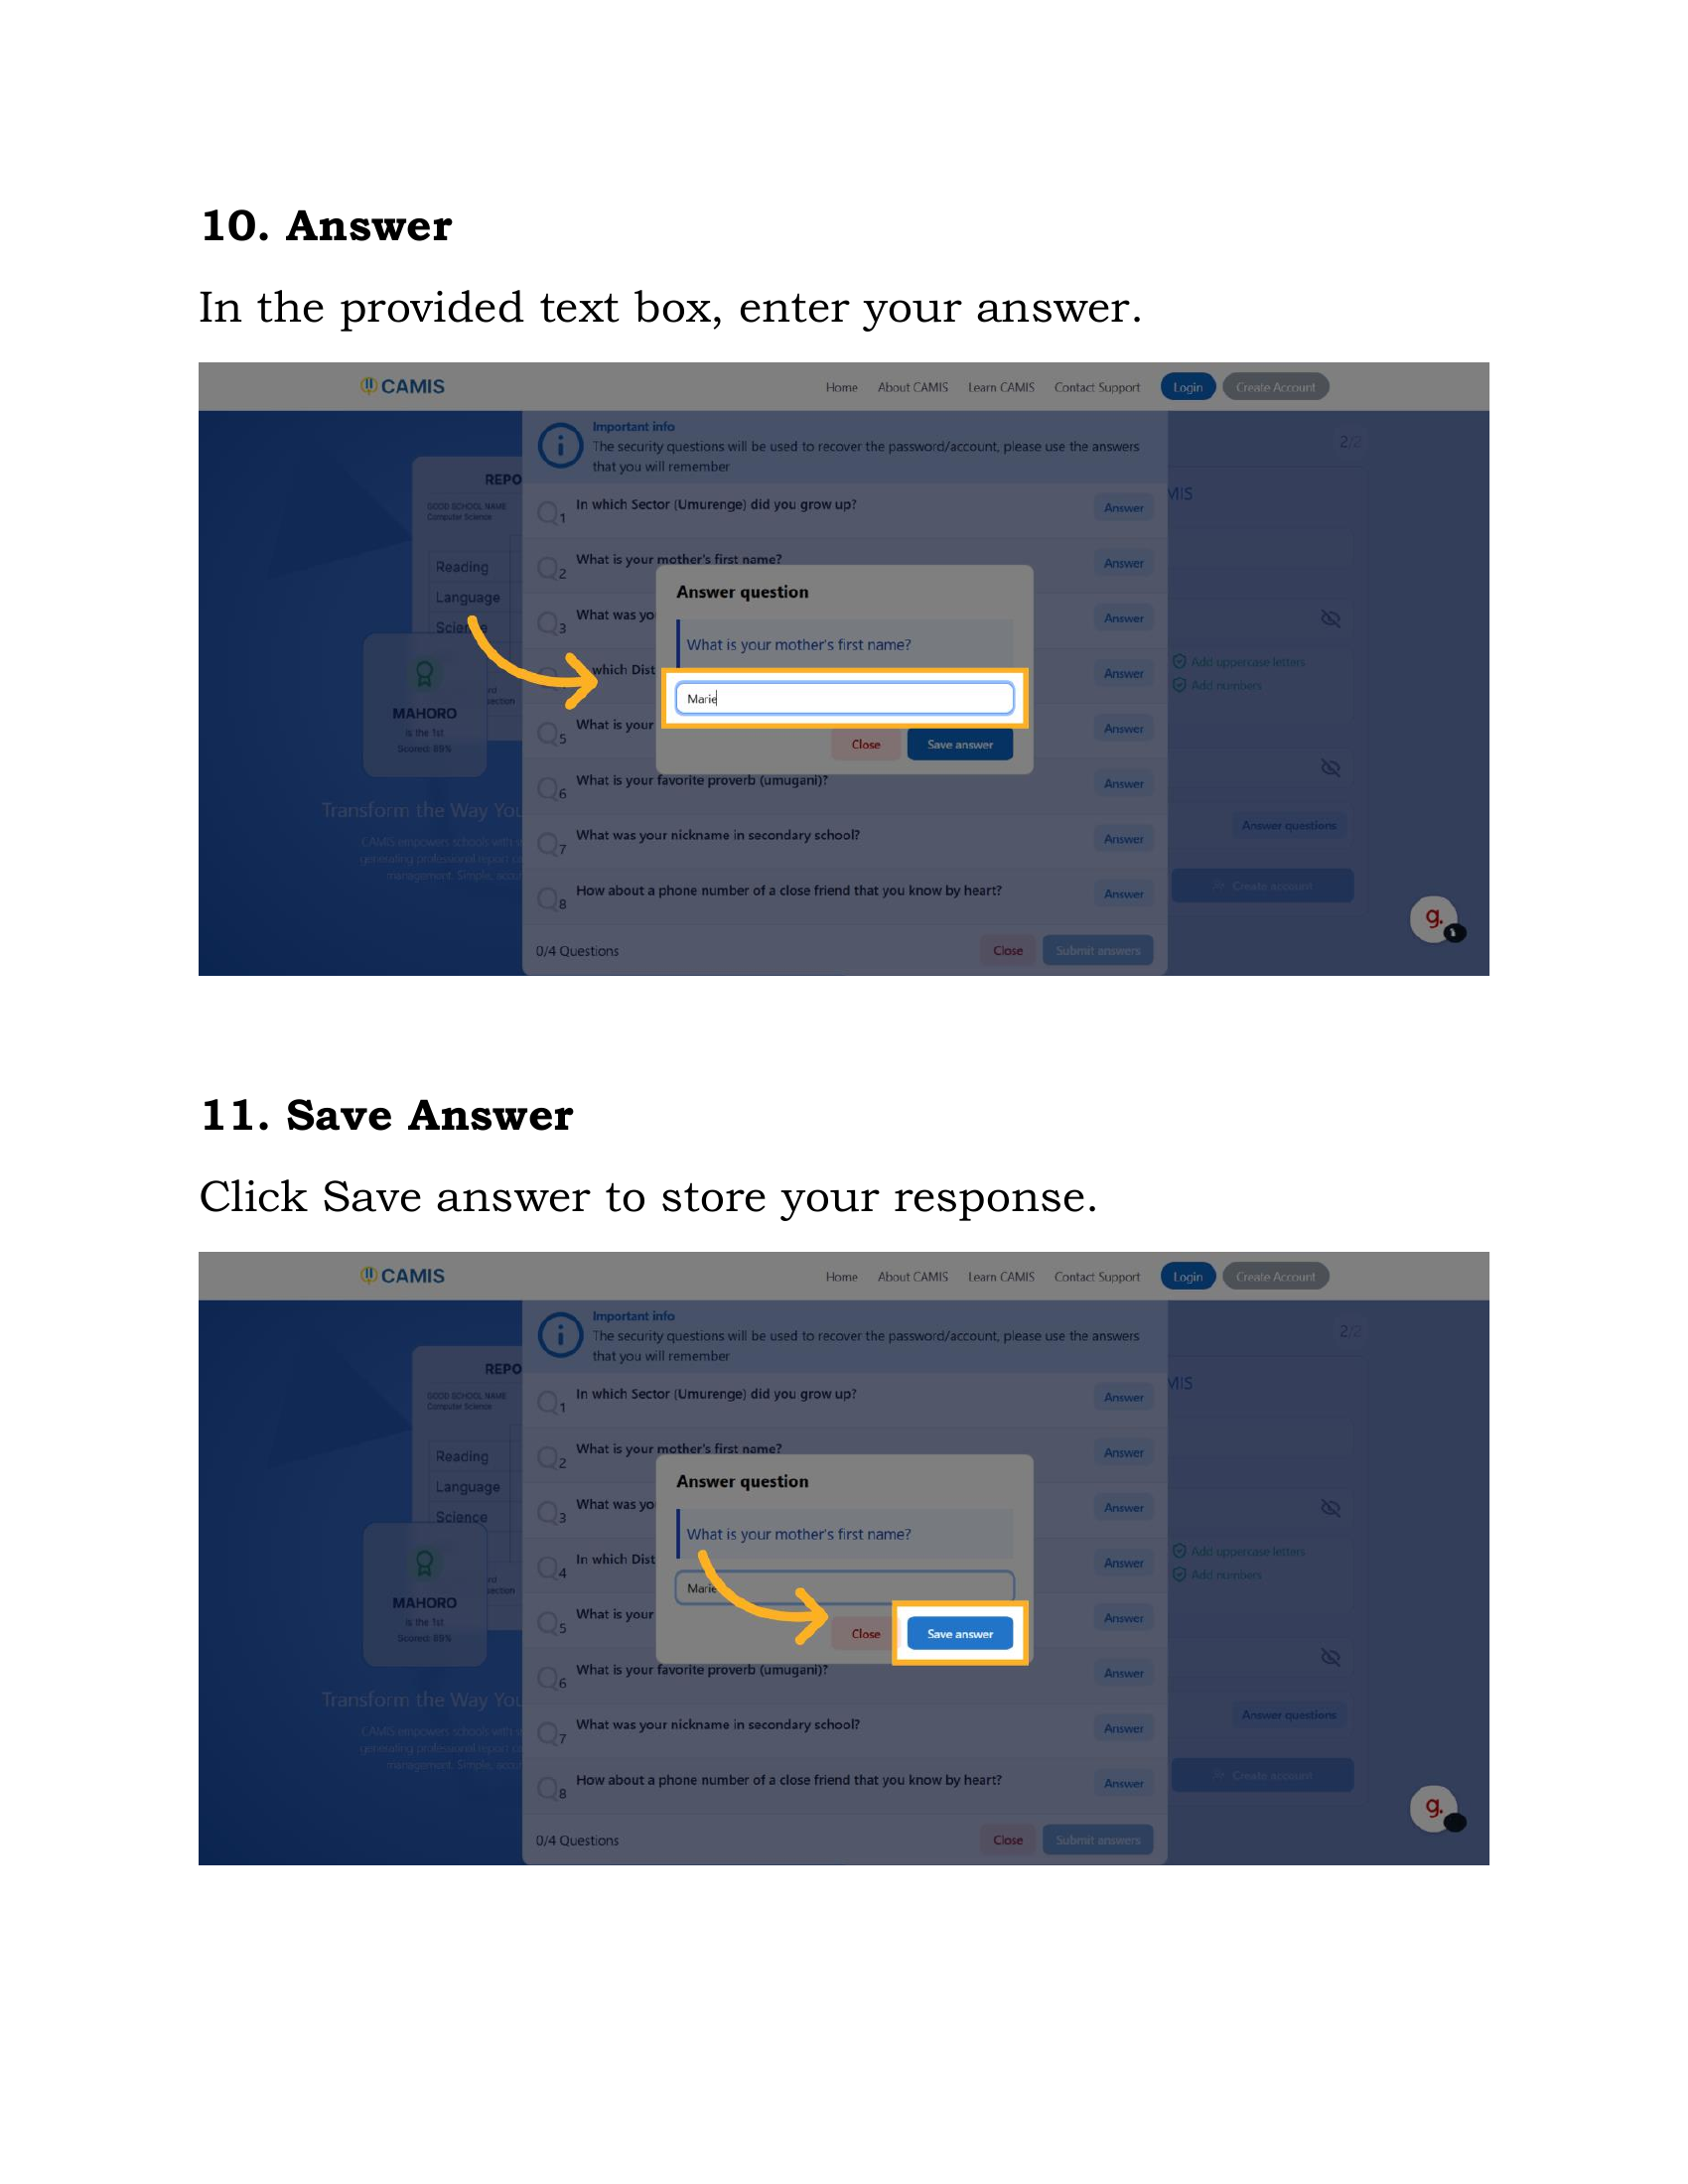
Step 7: Select and Answer Security Questions
You will now select and provide answers for your security questions.
Action: Click the "Answer" button next to the question you wish to select.
Action: In the provided text box, enter your answer.
Action: Click "Save answer" to store your response.
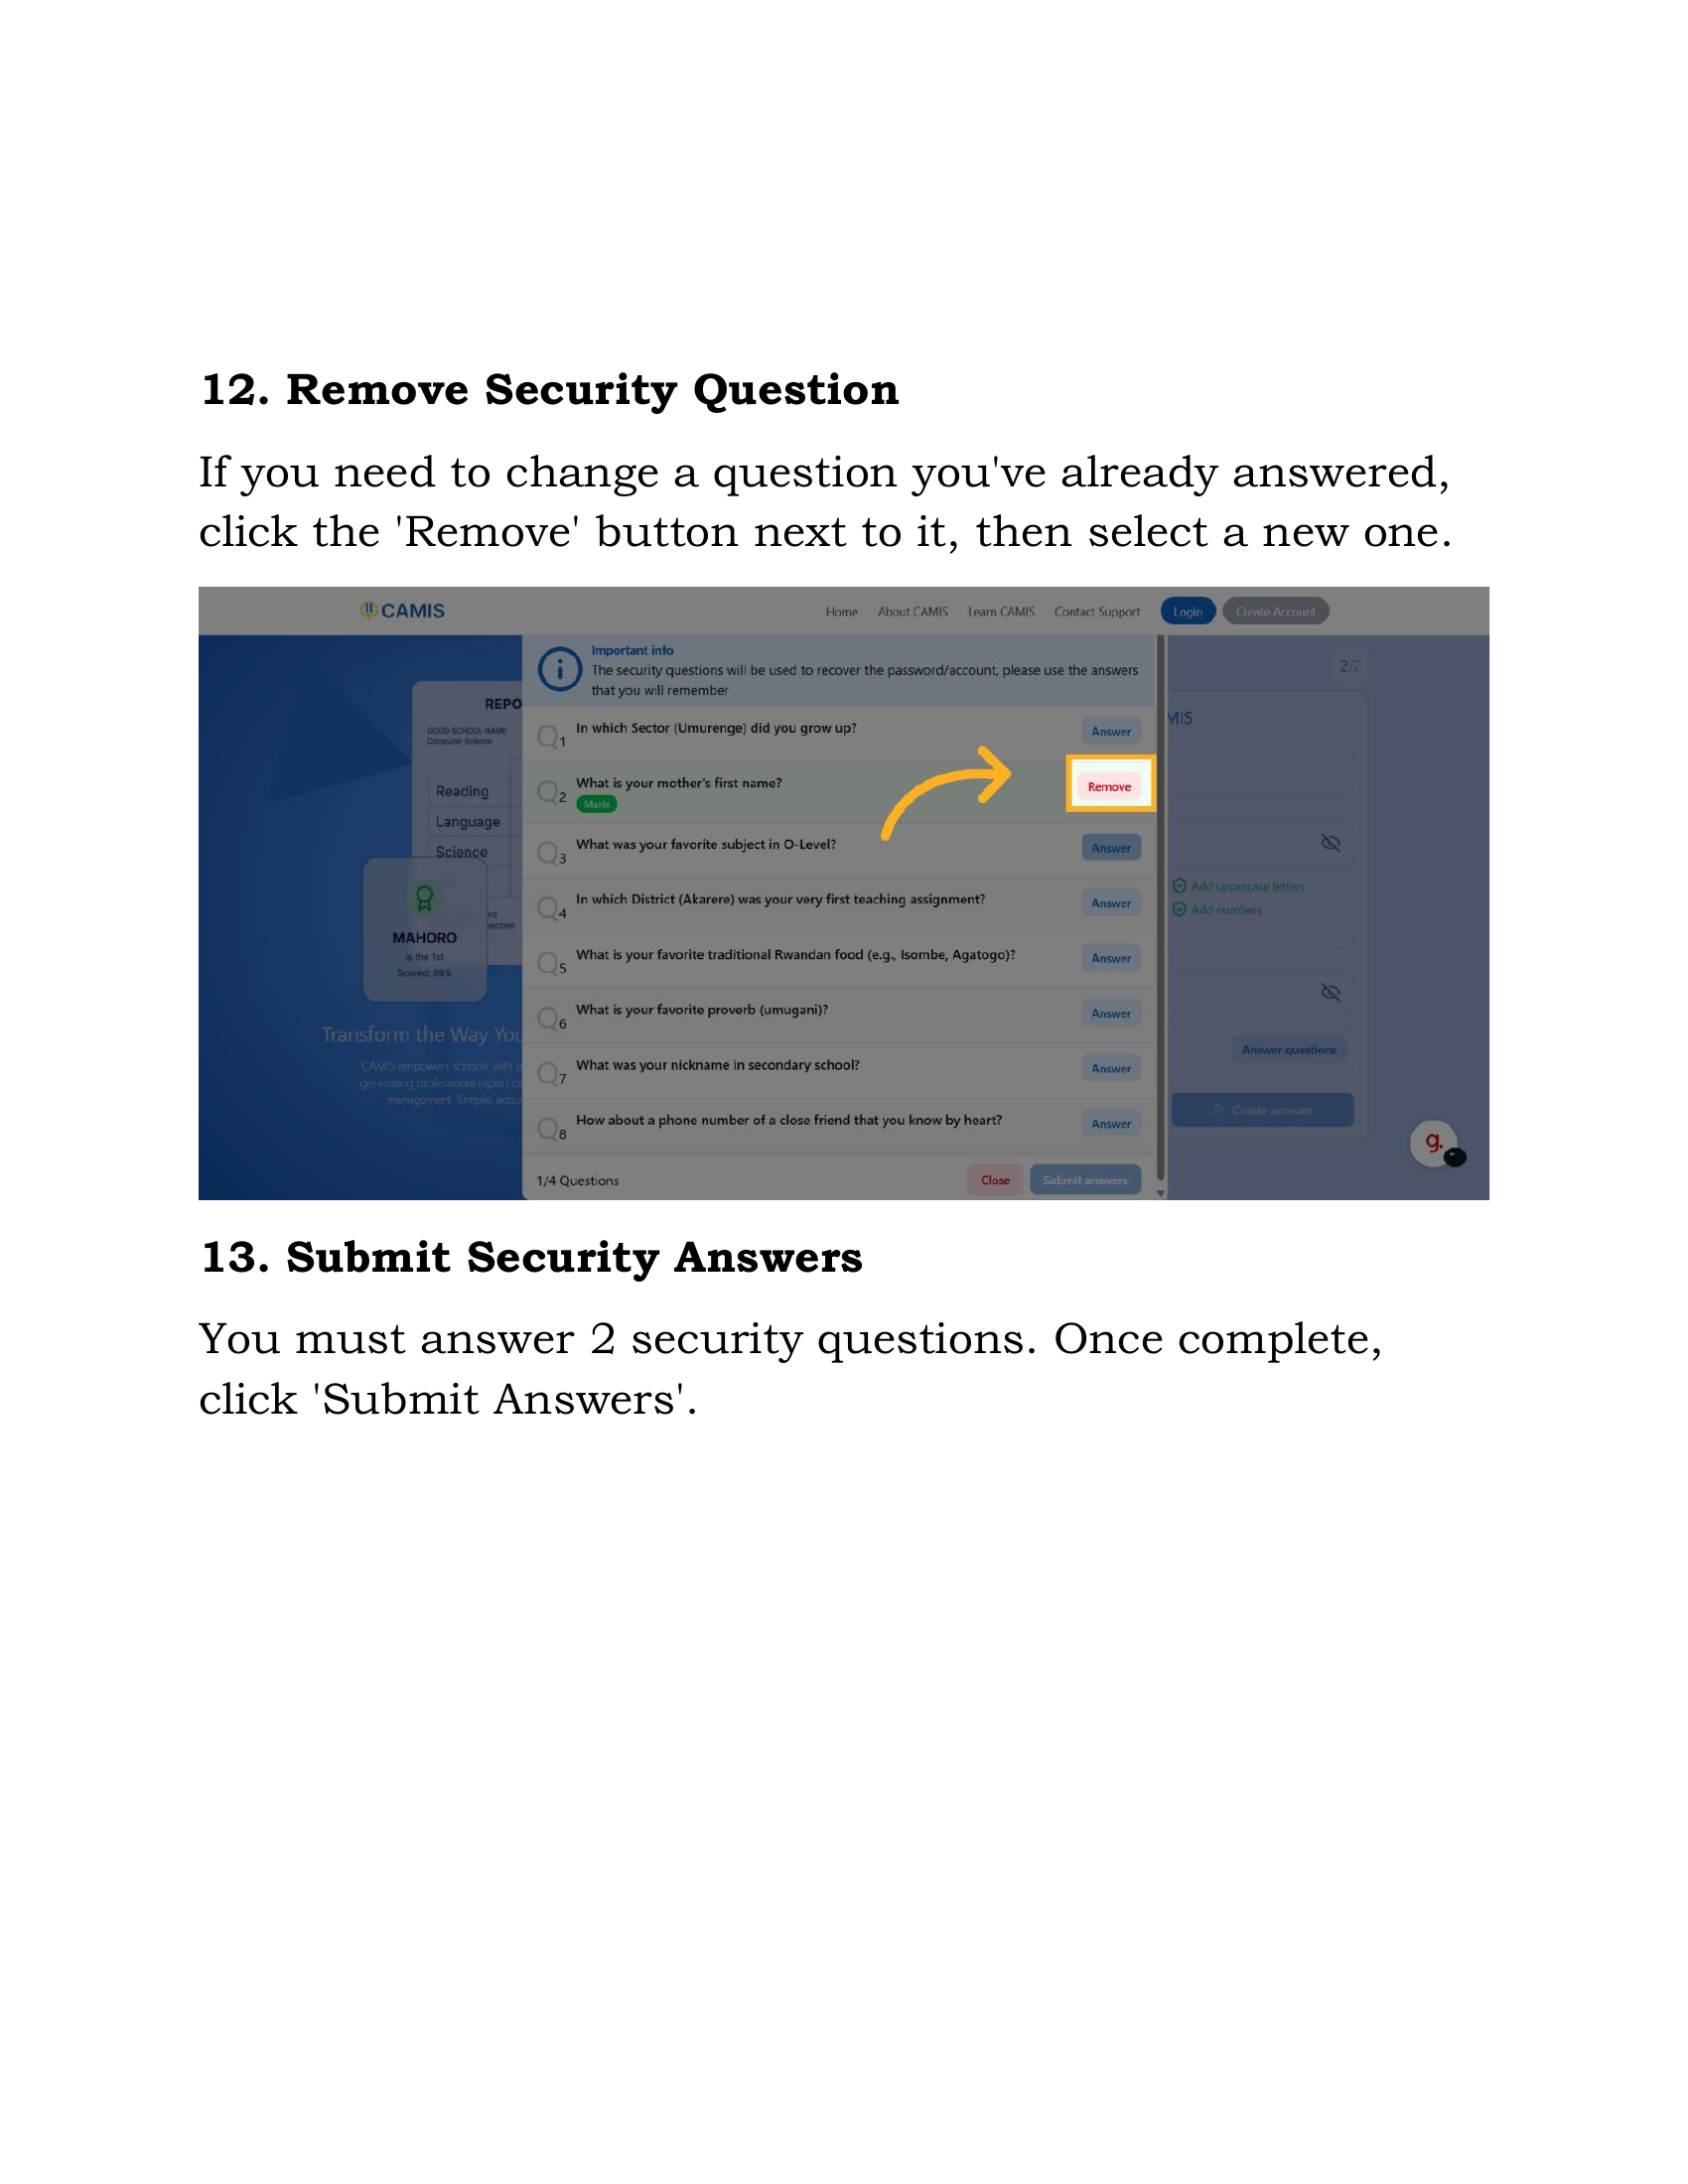
Step 8: Manage and Submit Security Answers
You must complete a minimum number of security questions before finalizing.
Action (Optional): If you need to change a question you've already answered, click the "Remove" button next to it, and then select a new one.
Requirement: You must answer 2 security questions.
Action: Once you have answered the required number of questions, click "Submit Answers".
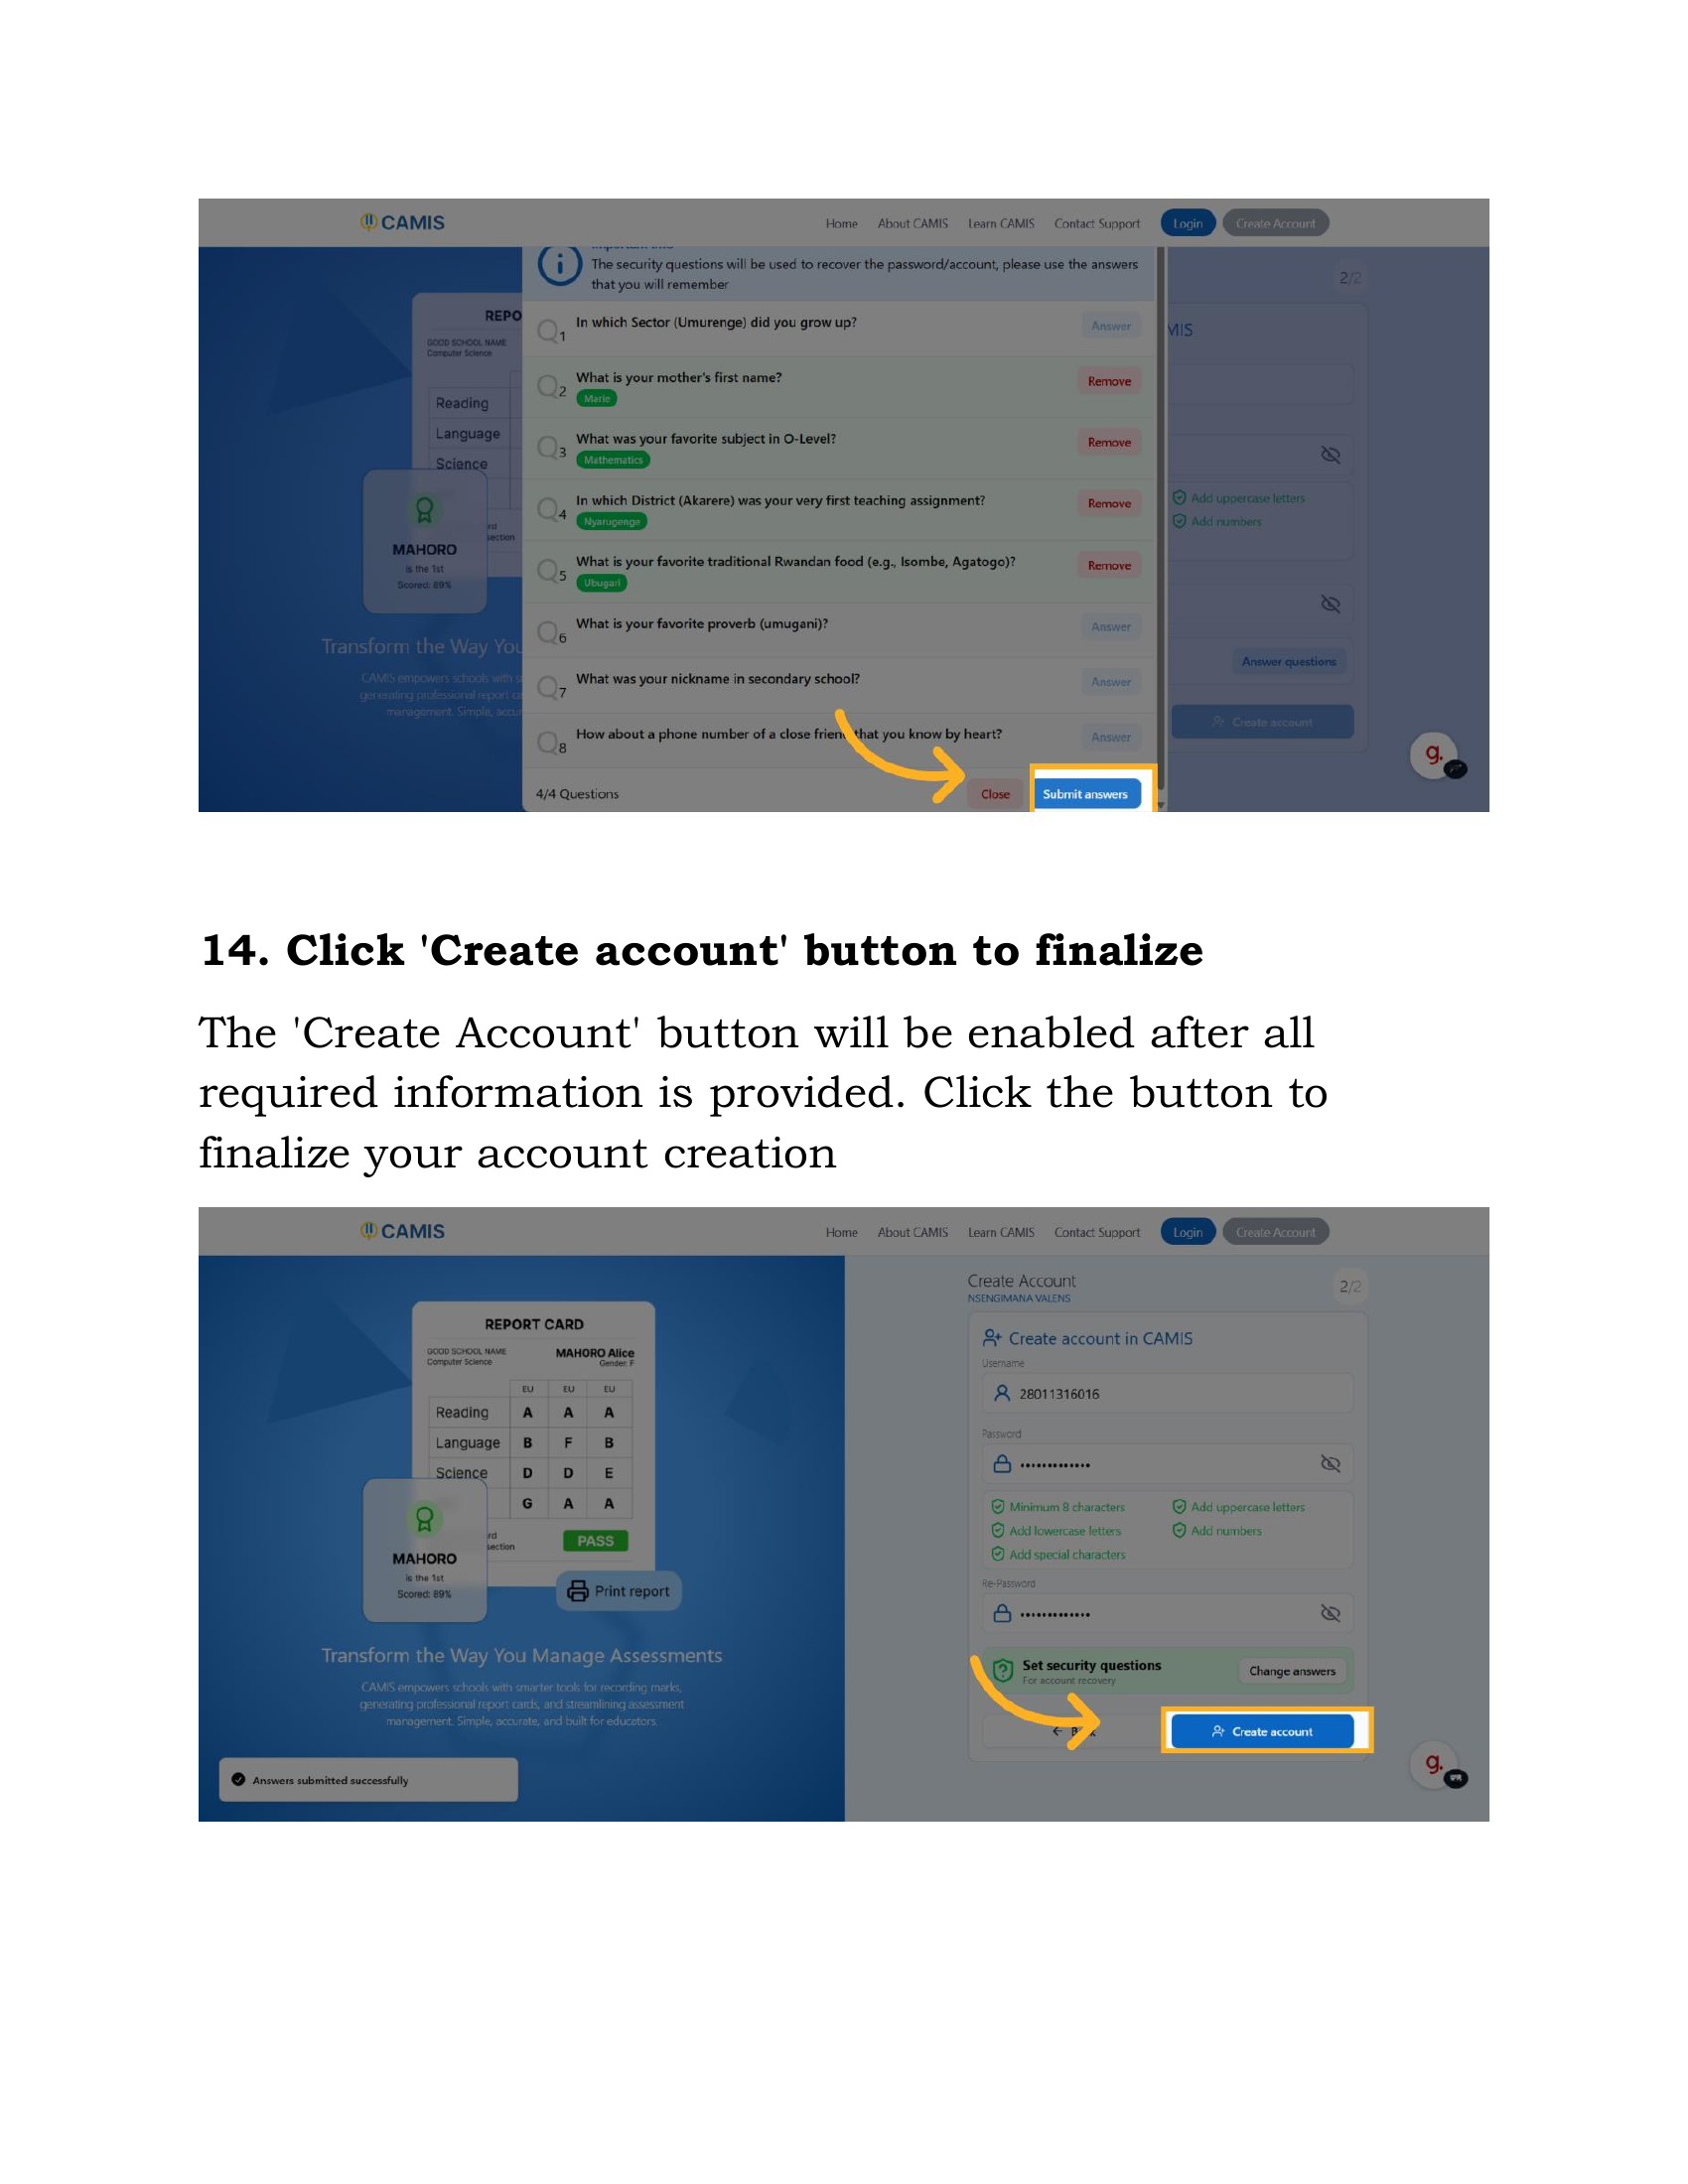
Step 9: Finalize Account Creation
With all required information provided, the final step is to create your account.
Action: The "Create account" button will become enabled once all steps are complete. Click this button to finalize your account creation.
Conclusion
Congratulations! You have successfully created and configured your CAMIS 2.0 user account.
You can now log in and access all CAMIS features securely.
Post a Comment